
|
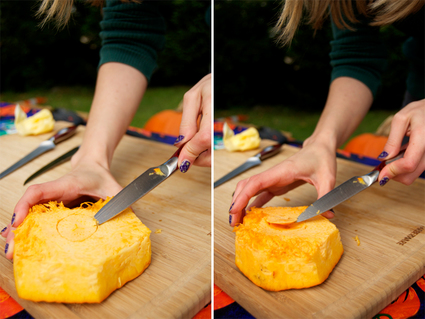
This is the year to become a pumpkin-carving pro. A jack-o'-lantern ace. A prince or princess of the patch. But you won't be able to succeed alone. No, you'll need an army of carefully crafted cutlery and insider intel. Luckily, we've got some tricks — and treats! — up our sleeves. Let's get started. 1. Start with the right tools. Say BOO! to those tiny, plastic carving kits that break mid-cut, and hello to cutlery that's heroic enough for the job. For our Magnets USA-inspired pumpkin, we chose our LifeLong Cutlery paring (left) and filet knives. Hello, dream team. 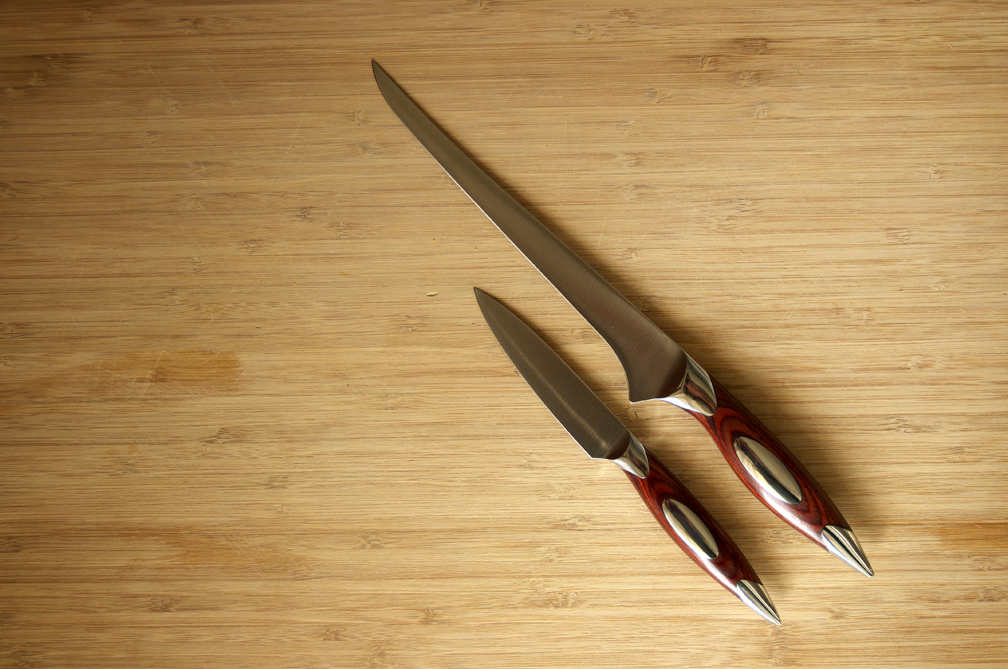 2. Begin at the bottom. Rather than cutting a hole around the stem, make one at the base of the pumpkin. This way, you can place the pumpkin over the light, instead of having to reach inside the pumpkin to position your candle. Pro tip: With your paring knife, carve an indention for the tea light to sit comfortably.
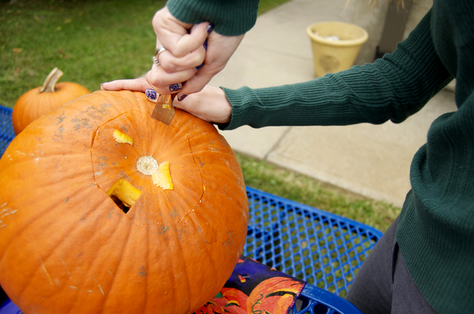
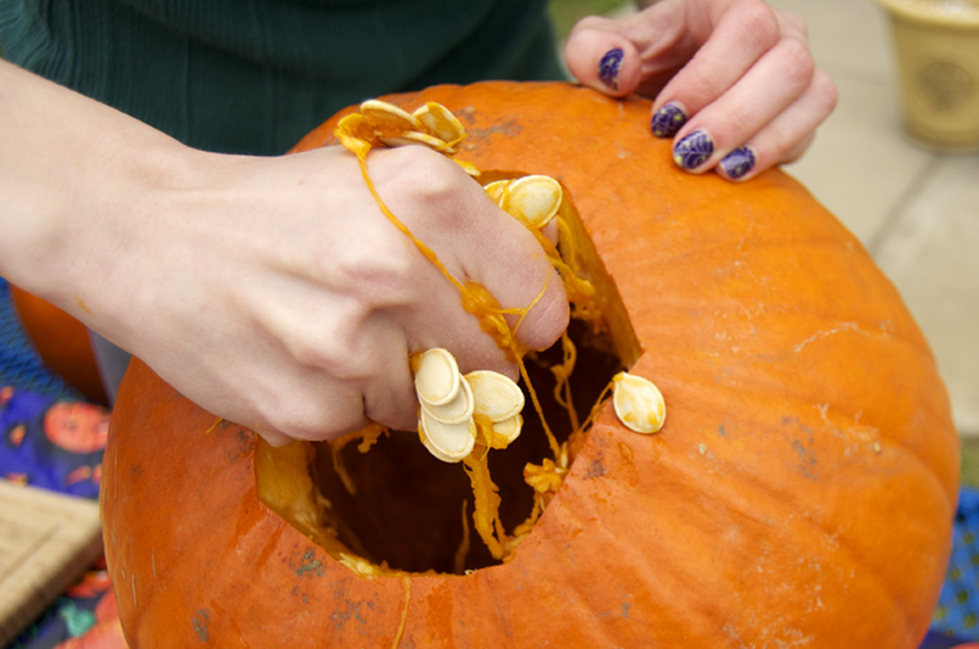
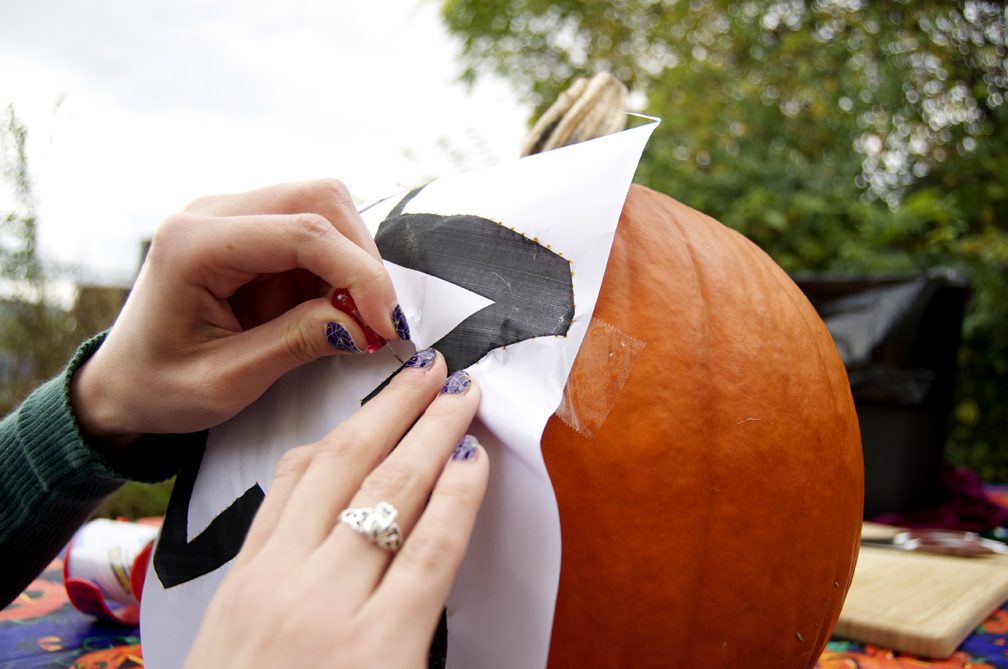
3. Gut it. Arguably the best part of carving a pumpkin, removing the insides is the time to conjure that messy kid you used to be. So roll up your sleeves, put on your game face and go for it. Pro tip: Save the seeds for a delicious treat. Did someone say Spiced Pumpkin Seed Brittle? 4. Punch your way to perfection. With your design taped to the pumpkin, use a thumbtack to establish an outline. When it comes to jack-o'-lanterns, staying inside the lines is a good thing — and will help prevent your freaky Frankenstein or cackling cat from becoming one terrifying blob.
5. Conquer the cut. We suggest starting with the smallest parts of your design. The paring knife, which features a short, easy-to-control blade, is a great detailing knife. For the larger sections, we found that the filet knife, with its thin and flexible blade, was best. 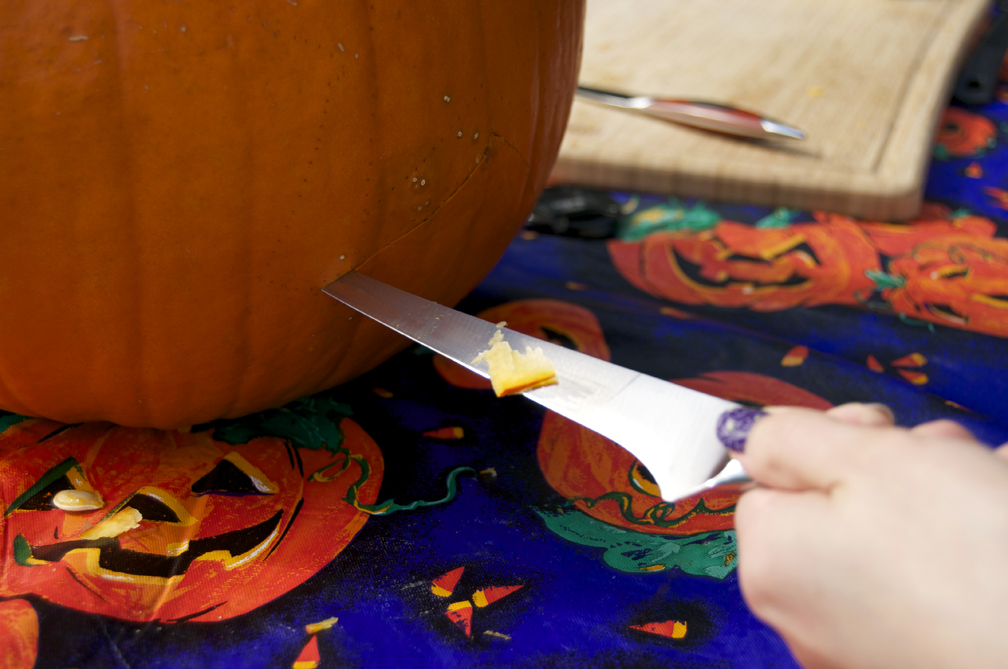 6. Polish it off. When you're finished cutting and all the pieces have been removed, it's time to add the finishing touches. Use your paring knife to carefully shave any ragged edges or remove stray guts. Pro tip: To keep your pumpkin looking alive through Halloween night, mist the interior with a bleach and water mixture. This will prevent molding and keep bugs away. You can also cover the edges with petroleum jelly to prevent shriveling. 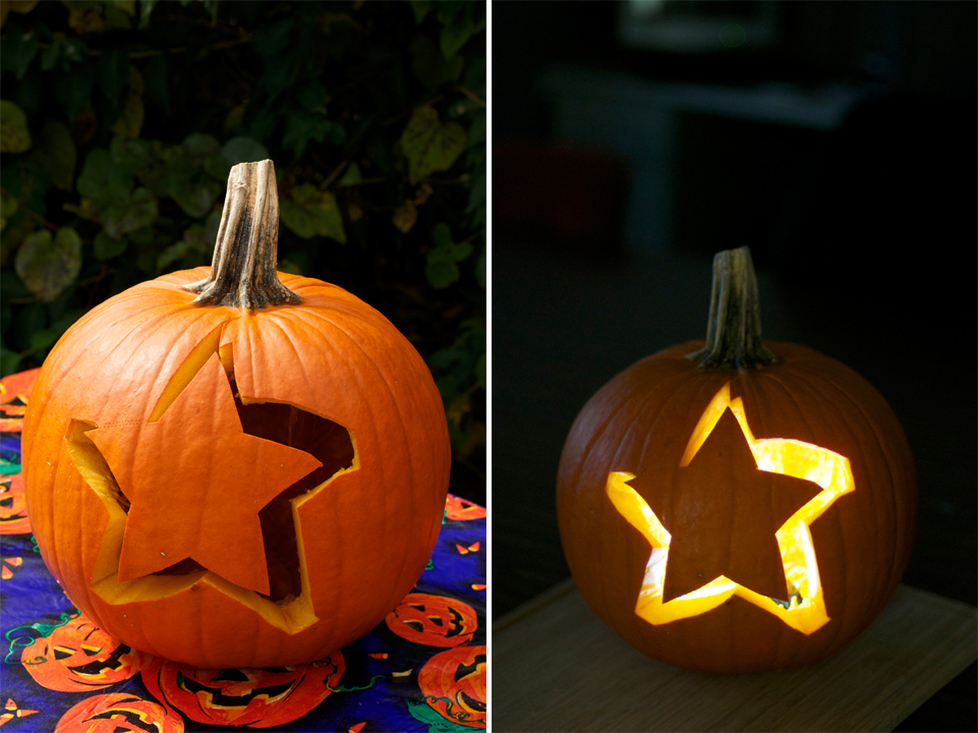 Comments are closed.
|
 RSS Feed