
|
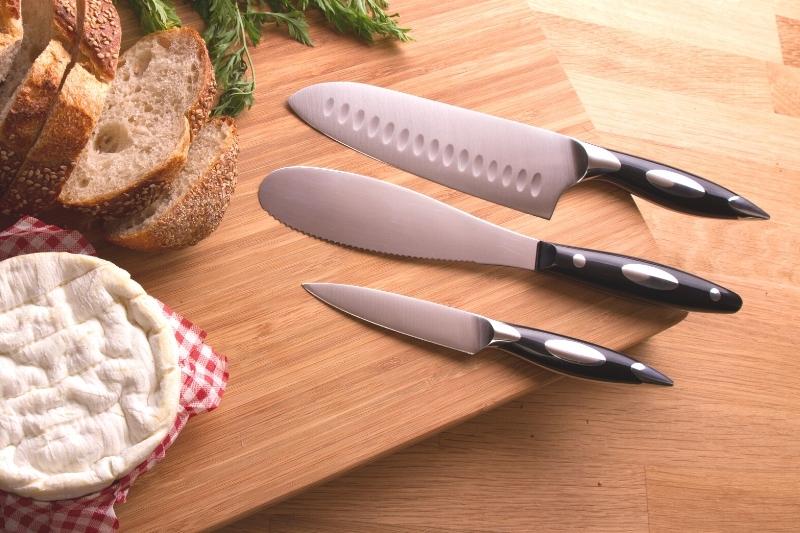
With regular maintenance, it’s easy to take care of your knives. Discover our top tips for knife care along with a handy guide for sharpening and honing your blades for the best performance. 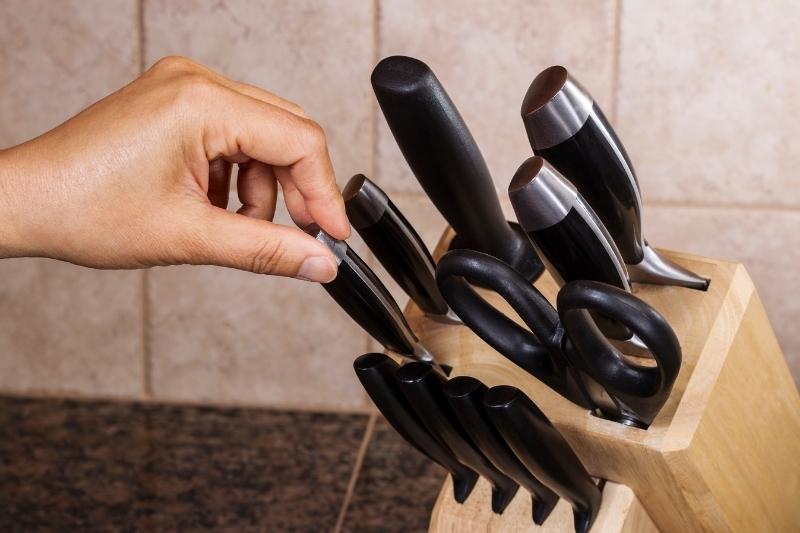 How to Take Care of a KnifeThe quality collections of kitchen knives from LifeLong Gifts™ are carefully crafted from high-carbon German steel to last a lifetime. Superior to stainless steel in that they hold a sharper edge and resist deformation, the blades of carbon steel knives do require regular care and maintenance for the best performance. Learn how to care for a knife the right way with these kitchen knife care tips. Plus, discover how to sharpen and hone your kitchen cutlery to keep the blades sharp and in premium condition.  Kitchen Knife Care TipsRegardless of what type of kitchen knives you own, basic knife care and maintenance is paramount to extending their life and keeping the blades sharper longer. Following are our top knife care tips to keep your blades in optimal shape. Whether you own Damascus kitchen knives, Chef’s knives, Santoku knives, an Ulu knife, or simply an everyday set of kitchen knives, these valuable pointers will ensure you always make the perfect cut!
How to Keep Knives SharpA sharp knife is a safe knife. In addition to the knife care tips previously mentioned, you can also keep your knives in tip-top shape with regular honing and sharpening. 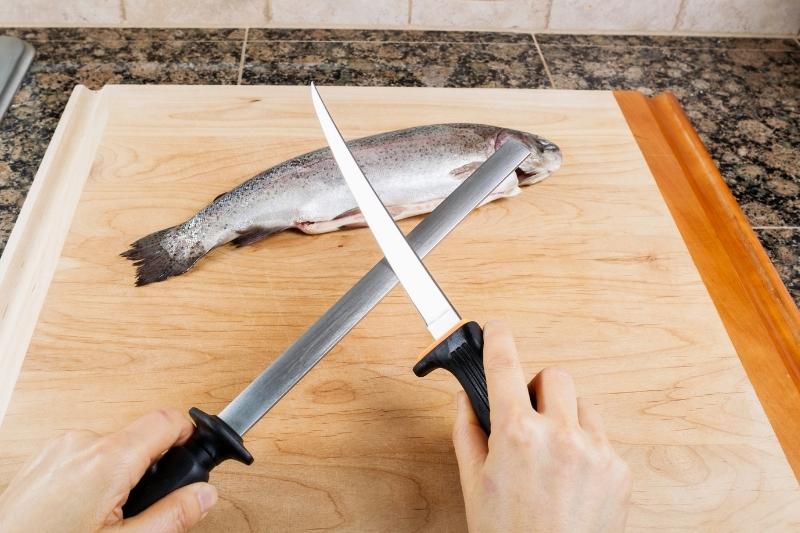 How to Hone a Kitchen KnifeYou may recall having seen professional chefs using a honing steel. This rod is made of either steel, diamond-coated steel or ceramic. Unlike a knife sharpener, a honing steel won’t sharpen the knife blade. As no steel is removed from the edge when it is used. Despite this, honing does play an important role in regular knife maintenance and care. So, what does honing do? And why is it associated with knife sharpening? With regular use, the edge of your knife blade will start to bend. A honing steel straightens the edge back to the correct angle for proper alignment. To hone a knife blade, place it against the base of the honing rod. Then place the blade along the steel at a 20°-22° angle. Slide it diagonally away from yourself while holding the honing rod in a fixed position. This action is then completed between 5 and ten times per side of the knife blade. Using a honing steel correctly, however, does require some level of both skill and practice. For this reason, LifeLong Gifts™ offers an everyday sharpener for your kitchen knives. This tool hones the blade of your carbon steel cutlery. It also sharpens the blade at the same time, by removing a very small amount of steel to account for small nicks.  How to Sharpen Kitchen KnivesThe everyday knife sharpener makes it a breeze for even beginners to sharpen a knife. This fool-proof method eliminates the need to hold the blade at a precise angle. It also takes the guesswork out of trying to figure out the proper way to use a whetstone. To sharpen a knife with a handheld knife sharpener, follow these easy steps:
 Knife Care and Maintenance FAQHave additional questions on how to properly take care of a knife? We’ve got you covered! Following are answers to common questions on knife care and maintenance. Why Won’t My Knives Stay Sharp?There are several reasons that your knives won’t stay sharp. The angle you use when making cuts as well as the surface material you are cutting on both determine how quickly knives may dull. When sharpening knives on a whetstone, it’s important to sharpen them at the proper angle. Otherwise, your kitchen cutlery may take longer to sharpen. There's also the potential to dull the blade. If the angle is too high, it will take longer to sharpen the blades. Additionally, if you rock the blade during sharpening, you’ll end up with a dull rounded edge. Likewise, not using a cutting board, or using the wrong type of cutting board, can also dull the blade faster. We recommend using a wood cutting board, like these cherry cutting boards, to extend the life of the blade between sharpening. 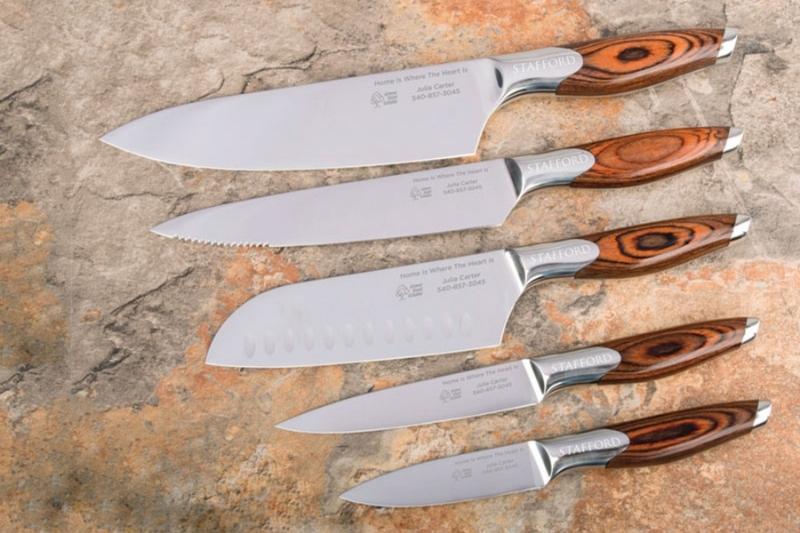 Further, the materials in which the blades are made also impact how quickly it dulls. Stainless-steel knives, for example, dull faster than carbon steel knives which are made from a harder material than stainless. In general, knives forged from harder materials hold an edge longer. Therefore, if you find you are having to sharpen your stainless-steel knives more often than you like, consider upgrading to a higher quality set of carbon steel kitchen knives. Will a Dishwasher Dull Knives?The harsh detergents, water and extreme temperatures of a dishwasher will not only damage the handle of your knives, but they can also dull and warp the blade. We therefore recommend that you always hand wash your kitchen knives. Do Knives Dull in Water?Leaving your knives soaking in water is never a good idea. Not only is it dangerous to leave a knife in a sink, but the water also has the potential to damage the blade. Not only is there an increased possibility of the blade rusting, but it will almost always cause the handle to degrade. In addition, most stainless-steel blades result in microscopic loss of metal when left to soak. Leaving a knife in water may cause the blade to dull more quickly. However, it can also cause more serious damage — and safety issues — that you want to avoid.  Should I Oil Kitchen Knives?It’s a good idea to oil your carbon steel kitchen knives a few times a year to help prevent rust and corrosion. Oiling knives can also help to condition the metal and keep the blade sharp depending on the type of oil used. How Often Should You Oil A Knife?To properly maintain an expensive kitchen knife, it’s recommended that you oil carbon steel knives after each use. Stainless steel knives, on the other hand, can be oiled once or twice weekly. What Oil Do You Use for Knives?There are several types of oil you can use on your kitchen knives. We recommend that you use synthetic oil as it lubricates the blade, resists dust and won’t go rancid like natural oils, such as olive oil. Food grade knife oil is non-toxic, odorless, and flavorless, making it the best option. You can also use food grade mineral oil. If you prefer to use a natural oil, then we suggest using camellia seed oil. This natural oil is similar in composition to fractionated coconut oil. It is odorless and flavorless and has a lengthy shelf-life. However, unlike other natural oils, it won’t make the blades feel greasy or go rancid. Nor will it leave behind a sticky residue.  Are Dull Kitchen Knives More Dangerous?Using dull knives can be more dangerous than using a sharp knife. While you can get cut with a sharp blade, these wounds are generally not as deep or as serious as those caused by a dull knife. The reason being is that you need to use more force than usual when making cuts. Therefore, should the knife slip, the resulting injury is more severe due to the additional pressure that was used. Can You Clean a Knife with Rubbing Alcohol?As most steel is non-porous, it’s not necessary to sterilize a knife after use. Typically, rinsing and drying a knife before food has a chance to stick is sufficient. However, you can use 70% isopropyl (or rubbing) alcohol to clean and sterilize the blade if desired. To clean a knife with rubbing alcohol, just wipe the blade with alcohol, then put it away. There’s no need to rinse or dry the blade afterwards. However, it is important to note that alcohol is a solvent. As such, it will remove any oils from the surface of the steel blade. Therefore, you may want to oil your blade after sterilizing to help prevent corrosion. 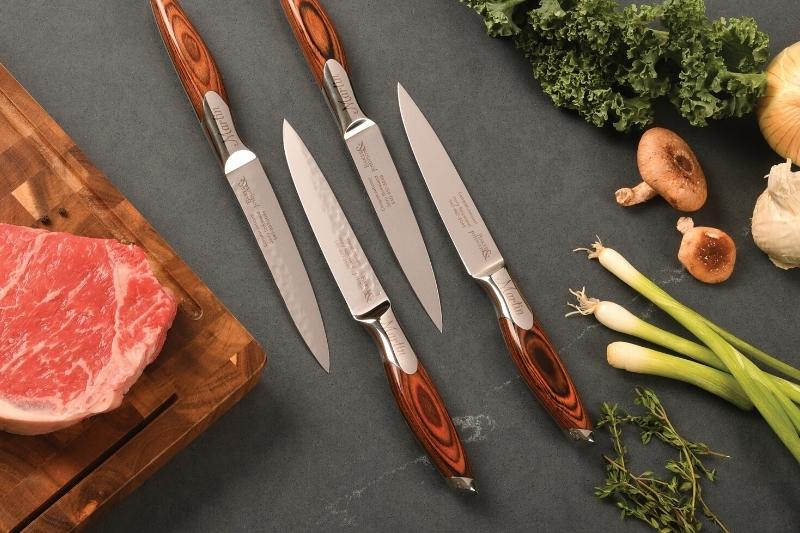 Why Do High Carbon Steel Knives Discolor?The blades of carbon steel knives tend to tarnish and develop a blue-gray or purplish patina over time. This happens when the blade is exposed to either air or acids. This type of oxidization is common and no cause for concern. While rust will damage your blades, patina does not. It can also aid in the prevention of damaging rust. Foods that promote discoloration include fatty fish and meat, fruits and acidic or alkaline vegetables. How Do You Remove Oxidation from a Knife?Sometimes, despite all precautions and proper knife care, high carbon steel knives do rust. If your blades develop rust or tarnish, there are several methods you can employ to remove oxidation from your knives. Here is how to remove oxidation from a knife:

Regardless of what method you choose to remove oxidation from a knife, we do recommend that you apply a lubricant to the blade afterwards. Oiling your knife is an important step in knife care and maintenance to help prevent future or further rusting.  Where to Buy Custom Kitchen KnivesWe hope these knife care tips instruct you on the proper use and care of a kitchen knife. Meanwhile, if you’re looking for a new kitchen knife set, or if you need personal or corporate gift ideas, be sure to check out the line of custom kitchen knives from LifeLong Gifts™.
Just as the name implies, LifeLong Gifts™ offers superior-quality, heirloom-worthy products designed to last a lifetime. Fall in love with our engraved kitchen cutlery, custom cutting boards, wood wine gift boxes and more! Shop this unique line of luxury gifts today. Or sign up to receive the latest deals and promotions. Discover our top Thanksgiving safety tips for a happy and healthy holiday. This post covers precautions to take when cooking, traveling, and preparing food for your guests.  Believe it or not, Thanksgiving is a top day for cooking related fires in the home. There also tend to be a lot more kitchen and travel accidents this time of year. To help avoid turning your holiday upside-down with a mishap, we rounded up a collection of the best Thanksgiving safety tips. These tips are just a basic reminder of where you need to take extra precautions to keep you and your family safe. So, you can simply enjoy a well fed and happy holiday without incident! Thanksgiving Safety TipsWhen you think about Thanksgiving, staying safe likely isn’t something that automatically springs to mind. (Unless maybe you have relatives that terrify you every holiday for one reason or another.) However, cooking fires are common this time year, with Thanksgiving being a peak day for cooking fires. Not only are more people spending time in the kitchen preparing for guests, but there are also a lot of folks who are making Thanksgiving dinner themselves for the very first time. Therefore, in order to help you avoid any unanticipated surprises, as well as any potential disasters such as a kitchen fire, we’ve put together a list of our top Thanksgiving safety tips to keep you and your loved ones safe.  Cooking and Fire Safety

 Food Safety Tips for ThanksgivingFoodborne illness is never fun. Not only do we want to protect ourselves from getting sick unnecessarily, it’s also vital that we keep our pets in mind as well. Here are some simple rules to follow this Thanksgiving to ensure food safety.
 Thanksgiving Travel Safety TipsMost of us travel for the holidays. Whether we’re visiting friends or family or need to make that last minute run to the grocery store, it’s important to be cautious and extra diligent on the holiday. Following are our best Thanksgiving safety tips to consider when you travel.
 We hope you found our Thanksgiving safety tips helpful! For more ways to stay safe and help protect your friends, family and community, be sure to check out our emergency and safety tip magnets. These custom magnets can be personalized with your business information. So, they’re a great way to look out for your neighbor, while also staying in the forefront of your customers’ minds.
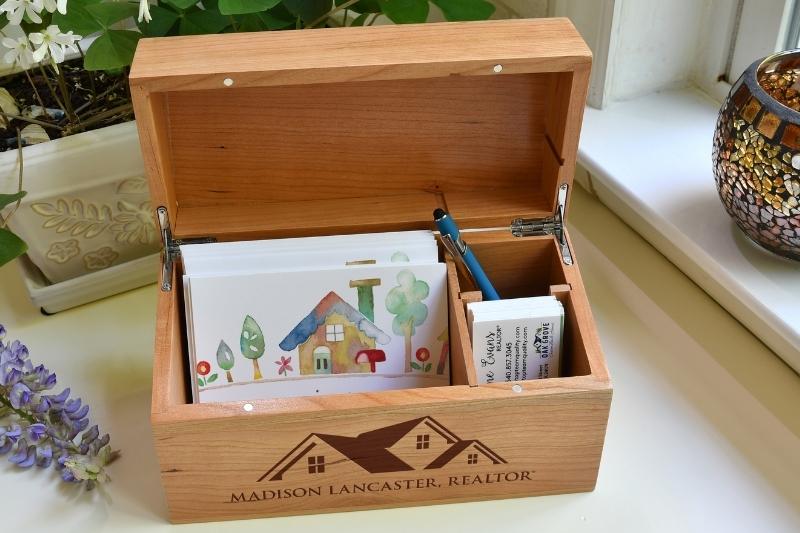
Learn how to make a memory box to mark important occasions in your life, or that of a loved one. Plus, explore our ideas on what to put inside a keepsake box to preserve your memories and important mementos for years to come. 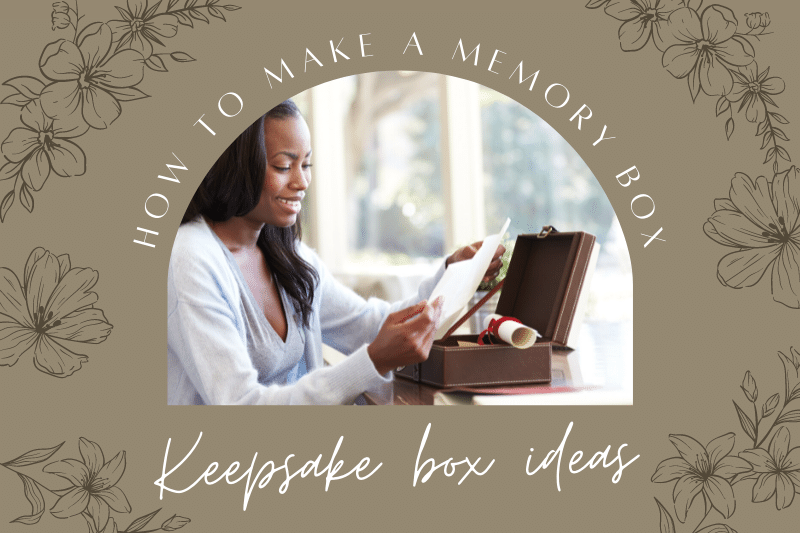 How to Make a Memory BoxIt’s easy to make a memory box for keepsakes related to a celebratory event, to mark a happy period in your life or to remember someone who has passed. Not only will this treasured box hold your memories and keep them safe, but it’s also a wonderful way to revisit these keepsakes later. To create a memory box, all you need is a quality, wooden keepsake box and the materials you’d like to put inside. While you can purchase inexpensive boxes and then decorate them yourselves, we love the quality and personalization available with the keepsake boxes from Magnets USA. These wood boxes are crafted from beautiful American Cherry or Walnut wood. Available in a variety of themes and designs, these boxes and can be professionally engraved as an elegant and easy way to store your most valued treasures, recipes, photographs, and mementos. 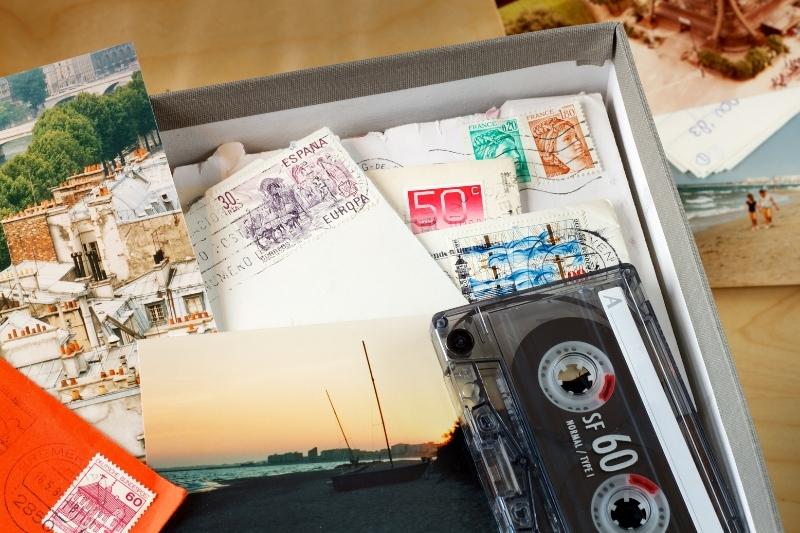 What to Put in a Keepsake BoxWhat you put in a keepsake box depends on the theme you settle on for your memories. In the end, however, it’s all up to you! This is your box! Therefore, you can fill it with anything that’s sentimental or meaningful to you. We love curating our boxes with a theme in mind so that they tell a story. However, you can also slowly add elements that have personal meaning to your keepsake boxes over time. To help you out, we’ve pulled together some great memory box ideas along with suggestions as to what to include inside. We hope you enjoy these ideas for keeping and passing down little treasures of your memories. Memory Box IdeasNeed ideas for memory boxes? Whether you’re creating a keepsake box for yourself or giving one as a personalized gift, these themes are all great choices! 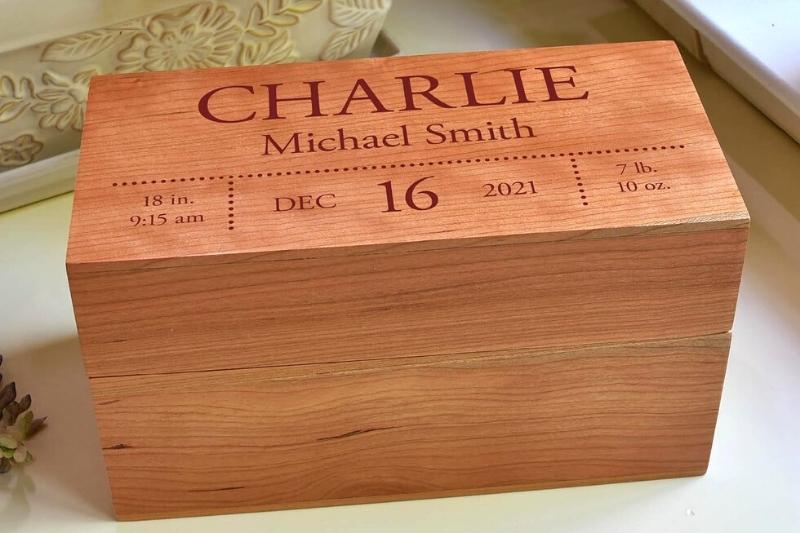 Memory Box Ideas for BabyNew moms will appreciate being the recipient of a memory box for their baby! After all, childhood passes by so quickly, it’s important to mark new milestones to preserve for when they’re grown. While parents will appreciate receiving a memory box for their child, it’s also something they’ll likely fill themselves over time to mark baby’s first year. Common items to include in a keepsake box for a child include a lock of hair, newborn footprints, the hospital wristband, that first pair of baby booties, and physical photographs. You can also include a newspaper announcement from their birth, congratulation baby cards, or a coin from the year they were born. As they grow, things can be added such as a first tooth, a favorite stuffed animal, awards or certificates, artwork, and school pictures.  Wedding Keepsake Box IdeasYour wedding is a day to be remembered. As one of the most important days of your life, marking the occasion with a wedding keepsake box is a wonderful way to reflect back and share those treasured memories. When making a memory box for your wedding, you can include any number of items from the date inside. Things like dried flowers from the bride’s bouquet or the groom’s boutonniere, the wedding cake topper, a garter belt, and a groom’s bowtie are all wonderful choices. You can also add a copy of the vows you wrote for one another along with a copy of your invitation or save-the-date cards or wedding cards you received from guests. Even a napkin or wedding favor make great additions. 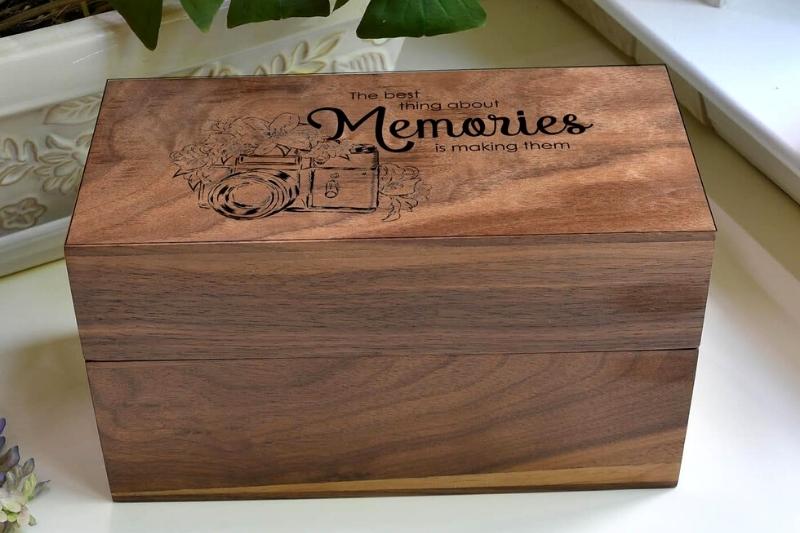 Memory Box Ideas for CouplesSimilar to a wedding memory box, you can also make one for your relationship. Take the time to have your most treasured photographs printed from your phone to put inside so they aren’t lost down the road. You can also include love letters you’ve written to one another, travel journals, and ticket stubs from memorable events. In addition, you can also create a combination wedding/couples treasure box that highlights both trinkets from your wedding and your many adventures afterwards. Anything that highlights your love for another, including those honeymoon souvenirs, are fair game for a fascinating trip down memory lane later in life. 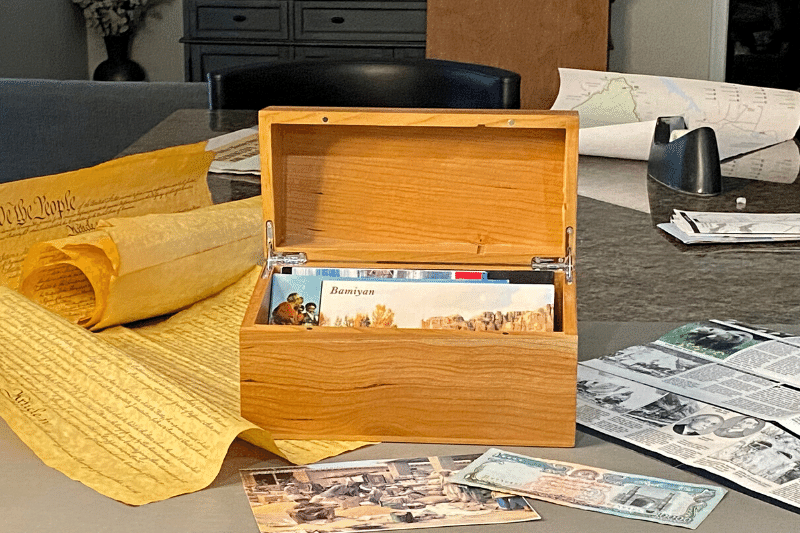 Travel Keepsake Box IdeasWhether you took the trip of a lifetime across the world or simply took that big vacation to Disney, these are the types of memories you want to preserve forever. In addition to physical photographs of your journey, ticket stubs, maps and souvenirs are all easy adds. We also love the idea of including shells from a beach trip, as well as postcards or thimbles from the places you visited.  Memory Box Ideas for GraduationGraduations, and other special occasions, are a big deal. Yearbooks alone often aren’t enough to hold all the memories of school friends and those noteworthy moments from high school or college. Report cards or transcripts from senior year, awards or certificates, graduation cap or tassel, and photos are all great options for a college or high school memory box. And, of course, graduation cards you received from friends and family are another great addition. Birthday Memory Box Ideas Like graduation, birthdays are another great event to celebrate, especially for children as they grow. For a birthday memory box, we like to include tokens from the past year prior to the big day as well as items from your child’s actual birthday. Therefore, you can put birthday cards and candles marking the occasion in a birthday memory box for a child. In addition, you can also add artwork they created or jewelry they recently grew out of, report cards, photographs of sports or activities they participated in – basically anything that’s special to the day or to your child as he or she has grown over the year. Grief Memory Box IdeasWhether you’ve lost a pet or a loved one, grief is hard. Keep the memories you have of that special person or pet alive with a memorial keepsake box. For pets you can keep their collar and tag inside along with a favorite toy. Otherwise, add your favorite mementos from the person you’ve lost. This could be letters and photos, their cherished trinkets or items, or even ticket stubs or their passport that reflect back on their travels and favorite pastimes. You can also tuck the funeral program inside the box along with dried funeral flowers, a printed copy of their obituary, sympathy cards, and any memorial gifts that you aren’t quite ready to process. 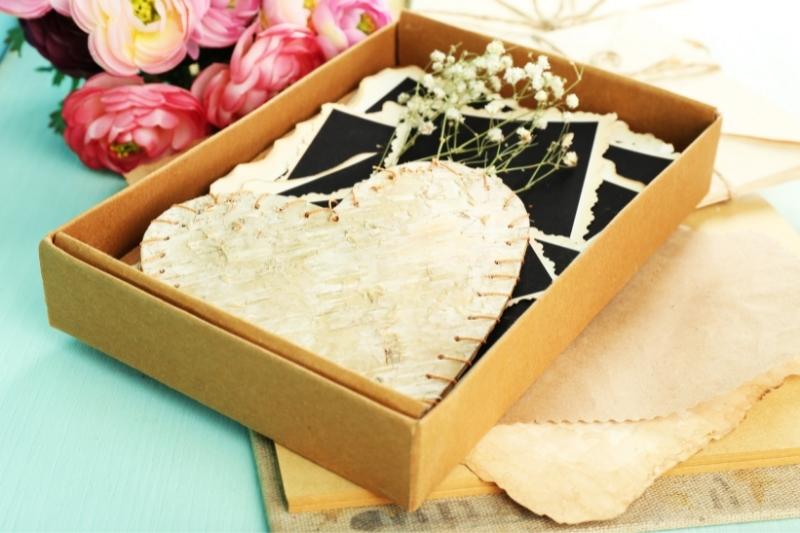 Anniversary Keepsake Box IdeasMark those memorable anniversary dates at 5, 10, 25 and 50 years together with an anniversary keepsake box! Wood is a traditional 5-year anniversary gift. Therefore, you can give an engraved keepsake box as a gift on its own to fill with treasures together. A recent photo to mark the date is the perfect way to kick off this sentimental keepsake. You can also include photos or treasures from an anniversary trip or dinner out, anniversary cards you received from loved ones, a map of your city, photos of your home, love letters to one another remarking on the time you’ve spent together so far, a key to you home, pressed flowers or even a mixed CD of your favorite songs as a couple. 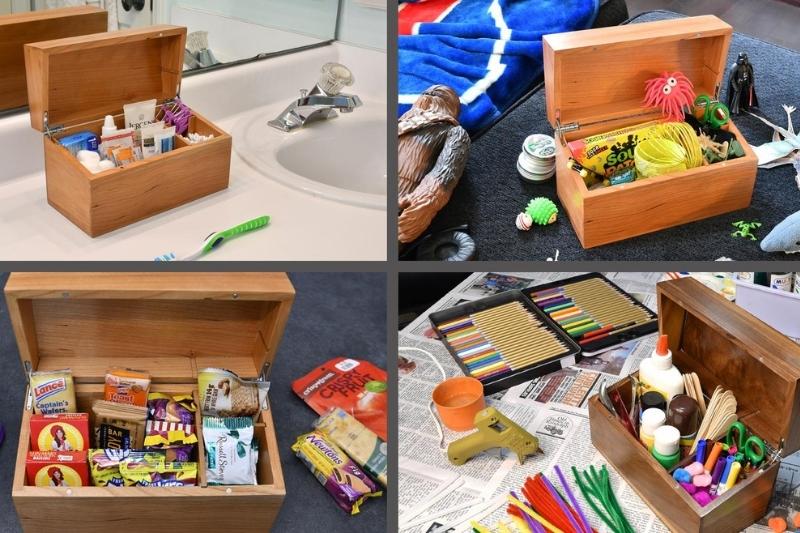 Other Ways to Use Small Wood BoxesOur personalized wooden keepsake boxes can be used for more than just making a memory box. You can also use them for storage and organization. Here are some of our top ways to use our wood engraved boxes in your home.
We hope you enjoyed this post on how to make a keepsake box. To keep up-to-date on new products and sales we offer on our line of personalized products, subscribe to our newsletter. You can also follow us on Facebook or Instagram.
To celebrate World Kindness Day, we’re kicking off a November writing challenge! Our goal is to help you connect with the people in your community and bring a little bit of joy to their day. For this, we’re asking that you simply send note cards to five or more people this month. Remind friends, family, and neighbors that you appreciate they are a part of your life. Or contact local businesses or staff to let them know they’re doing a great job! It’s amazing how infectious kindness can be when you take just a few minutes out of your day to show your gratitude. It’s also a great way to way to scrub out any lingering negativity that may be affecting your own mental health. 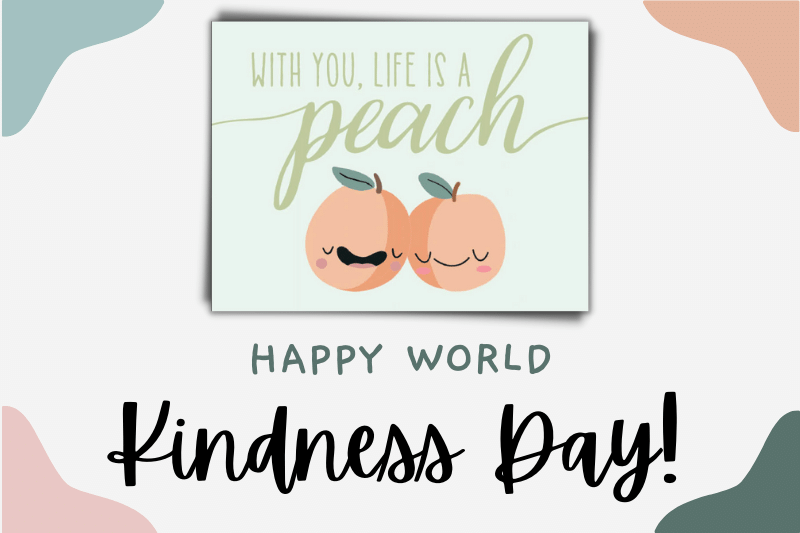 What Is World Kindness Day?World Kindness Day is November 13th. This annual international holiday was formed in 1998 by the World Kindness Movement to help promote kindness throughout the world. The purpose of this holiday isn’t just a reminder to be kind to one another and act with compassion in our daily lives. It’s also an opportunity to grow closer to our fellow man and community at large through understanding and thoughtfulness. 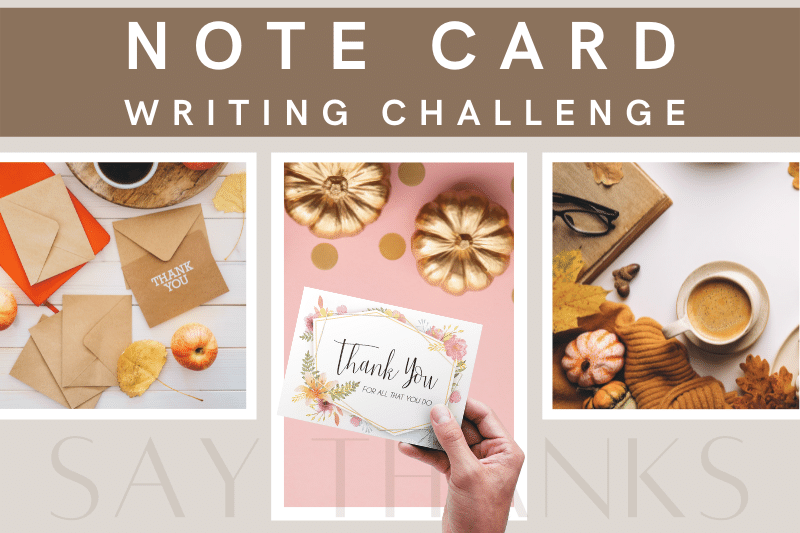 November Writing ChallengeFor our November writing challenge, we want to inspire you to write and send out note cards to the people in your life who matter but may not always get the recognition they deserve. So, whether it’s your child’s teacher, a cashier at your favorite shop, or a neighbor who keeps an eye out when you’re out of town, now is the perfect time to show your gratitude and bring a smile to their face. As the month of November is typically a time we express gratitude, we thought this would be the perfect occasion to kickstart a writing challenge. It not only ties in perfectly with World Kindness Day, but Thanksgiving as well. To participate in this challenge, we want you to inspire you to send out five handwritten note cards this month. That’s just one note card per week. Of course, you can send more if you like! We find that once you get into the habit or writing and sending cards, it’s hard to stop. After all, the joy recipients get from receiving greeting cards is truly inspirational. While writing personalized note cards may seem like a small gesture, it can have a huge impact on someone’s life. It’s also a wonderful break for the constant onslaught of daily junk mail and bills. Now that you’ve been challenged with a writing goal for November, you may be wondering how to get started. Not to worry, we have you covered! Keep reading to find the tools you need for success, including:
 What to Expect from This Note Card Writing Challenge This note card writing challenging is all about spreading kindness! Not only will sending handwritten cards lift up those in your community, but it can also have a positive impact on your own mental health. When you care kind to others, you can expect the following health benefits as a result:
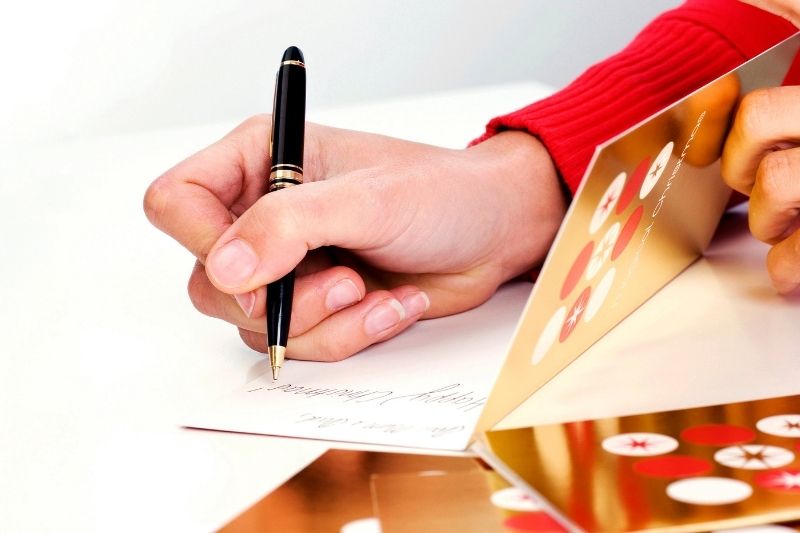 When Is a Good Time to Write Cards?Today is a great time to write cards! Whether you’re sending a thank you card or just reminding someone that you’re here for them, it’s never too late to pop a note in the mail. However, it is best to not feel rushed when creating handwritten note cards. Therefore, we suggest you choose a time when you aren’t busy. Start by creating a list of people you’d like to mail greeting cards to and why. Once you have your list, set aside 5 minutes once a week to write a thoughtful note to at least one person on that list.  Who Should I Send Cards To? Friends and family are obvious choices when deciding who to send out cards to. Nonetheless, there are so many other options to spread kindness. Following is a list of just a few of the many people you can send a custom greeting card:
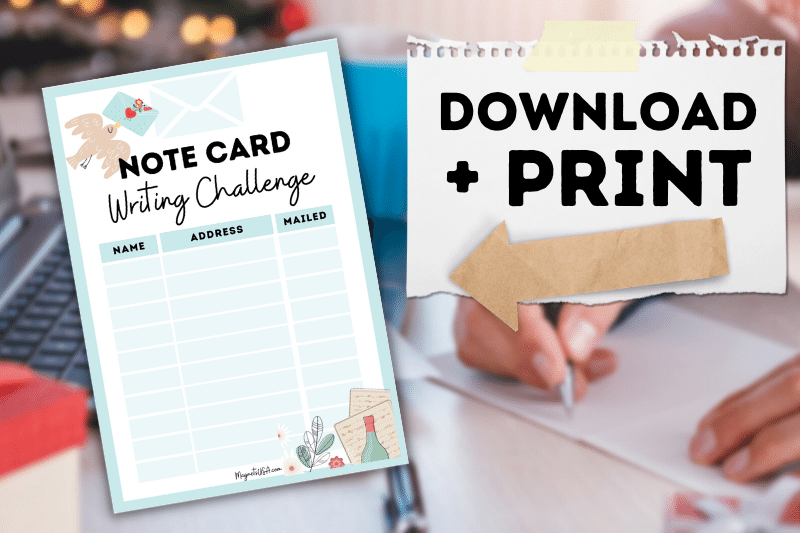 Printable Address ListMost of us don’t have physical address books anymore. With contacts saved digitally, they often aren’t top-of-mind. Therefore, we created a printable address list to make participating in this writing challenge even easier. Not only will this printable address list help you plan who you want to write note cards to, it will also make it easier when it comes time to address and send your cards. You can also mark the date you mailed the card, so you can remember to follow up. Download our printable address list here.
Once you’ve printed the list, choose five people to connect with to start. Then add to the list as you have time to think about the people in your life, who you’re appreciative of, and those who would benefit from receiving a smile in their mailbox.  Where to Buy Custom Note Cards If you don’t want to exhaust your time at the store shopping for greeting cards, then consider buying your note cards in bulk.
Magnets USA® sells a full line of premium personalized note cards to help you tackling any writing challenge you set for yourself. Featuring our luxurious, signature PLUSH™ finish, our colorful lineup of personalized note cards highlights more than 200 original designs perfect for every occasion. Explore our collection of flat note cards, folded note cards, and house-shaped cards today. Then send cards and spread the love! Discover our tips for avoiding hiccups when tackling your Christmas list this holiday season. These simple pointers are key to hassle free shopping and on-time delivery this year. Plus download our free printable Christmas gift list to make planning even easier!  Holiday Shopping SeasonThe holiday season is quickly approaching. Every year it seems like it sneaks up on us. In reality, however, most of stay so busy that we simply forget to keep track of all those important dates. Unfortunately, with the pandemic continuing to wreak havoc on shipping times and prolonged supply chain shortages, planning for the Christmas shopping season this year is a must! Christmas Shopping TipsAvoid the challenges presented by shipping delays and supply shortages this year with our Christmas shopping tips for 2021. Following you’ll find a timeline for a smooth shopping experience to avoid disappointments on Christmas day.  When to Start Christmas ShoppingTo make your holiday shopping a breeze, we’ve created a timeline to help you stay on track, so you don’t get caught off guard. While some of these dates may have already passed, you can still catch up. Also make sure to mark these dates on your 2022 calendar so you can be prepared and plan early next year. Oct 12th — 12 Weeks Before ChristmasNow is the time to start planning what you’re going to give your business clients, friends, and family for the holidays. Make your list and decide on a shopping budget. If you’re planning to make homemade gifts, then now is the time to get started. Order supplies now if you haven’t already. Most craft stores are a season ahead, so waiting to purchase materials can make it difficult to find what you’re looking for the closer you get to Christmas.  Oct 16th — 10 Weeks to Christmas10 weeks may seem like a LOT of time, but you know as well as we do that if you blink it’s suddenly gone. There’s just over two months before the holiday at this point. So, now is the time to start your Christmas shopping. Not only will you be able to avoid the crowds, but you can also stay on top of any potential shipping delays. It’s also a great time to pre-plan your holiday parties or decide how you’ll celebrate. And, if you’re sending out Christmas cards, get the family together for the perfect holiday portrait. You can upload your photo to Minute Mail Gifts. Then go ahead and create a template for all your holiday cards you plan to mail out this season with your photo printed right inside the card! Oct 30th — 8 Weeks Until ChristmasWith less than two months until Christmas, it’s time to put on your face and get serious! Lots of businesses are already advertising hot offers that you can take advantage of to save money. (These days, there’s really no need to wait until Black Friday for the best deals.) So, whether you are shopping in person or online, use this week purchase gifts for as many people on your Christmas gift list as you possibly can. Now is also a great time to double check addresses for gifts and holiday greeting cards to make sure they are correct. You can also start planning holiday gatherings with your friends and family. Nov 6th — 7 Weeks Before Christmas(It’s finally November and it’s starting to feel real. If you are mailing out bulk Christmas cards, then order them NOW! You’ll also want to order address labels and stamps. Alternately, you can also start creating personalized greeting cards for Christmas with your photograph inside. Hop over to Minute Mail Gifts to see how easy it is. Not only can you personalize a handwritten card, but you can also schedule a date to mail out your holiday cards — and send them with a creative gift inside the envelope with no extra work.  Also at this time, you’ll want to take inventory of all your Christmas decorations. See what you have and what you need. If you’re missing any elements to create that perfect holiday display, then shop as soon as possible for whatever is missing. (Here locally we were sold out of Halloween decorations by the first week of October!) The same can be said for pantry staples and baking supplies. There’s going to be a rush on basic foodstuffs as shelves aren’t being restocked as quickly as they have been in the past. Stock up on essentials at this time to avoid scrambling to find out of stock items later. (Remember the meringue powder and yeast shortage last year?) Nov 13th — 6 Weeks to Christmas We know it seems like you’ve done a lot already, however, there’s still more work to be done to prepare for the holiday season. While you’re waiting on the gifts you ordered to arrive in the mail, now is the time to clean and organize your home. Go through the closets and pull out winter clothes that don’t fit to donate to charity. The same goes for kids toys that they’ve outgrown or no longer use. This is a great way to help families in need, and tackle some of those spring cleaning chores a season early.  If one of your family traditions is to make Christmas ornaments, then this is the time to get them done! You’ll also want to order or shop for your holiday gift wrap, including gift tags, ribbon, bags, and bows. Nov 20th — 5 Weeks Until ChristmasIt’s Thanksgiving week! Right now, you probably have a TON going on preparing for Thanksgiving dinner and related activities. However, there’s still work to get done to prepare for Christmas.  We recommend that you mail out your Christmas cards THIS WEEK for timely delivery. (There’s nothing worse than your card arriving AFTER the holiday is over.) You’ll also want to start mailing out care packages or Christmas gifts at this time. If you are ordering custom gifts that need to be personalized, then order them now and have them shipped directly to the recipient. 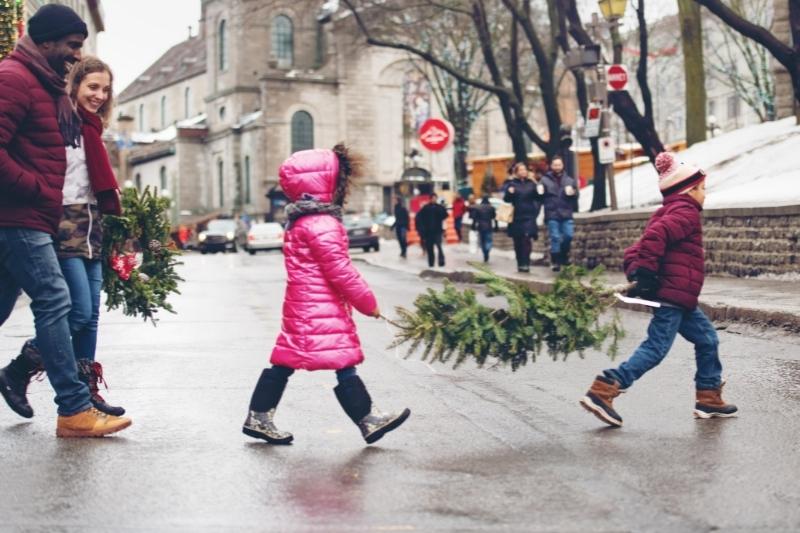 If you are decorating your home with a live Christmas tree this year, go ahead and order your tree or take a trip to your local Christmas tree farm. Nov 27th — 4 Weeks Before ChristmasThere’s now less than a month to go before the big day! (Are you getting excited yet?) If you have kids who are writing a letter to Santa, then make sure they get those letters written this week! They’ll need to be mailed by December 7th to ensure they arrive on time.  You can also put up your Christmas tree and holiday decorations now that Thanksgiving has come and gone. And don’t forget to pull out your Advent calendar! Dec 4th — 3 Weeks to ChristmasThe countdown is getting real at this point! If you have ANY last minute Christmas shopping, then get it done NOW! This is the absolute final chance to complete your online ordering as well in hopes your packages reach their destination on time.  Now is also the perfect time to wrap your holiday presents. After all, there’s nothing worse than staying up until 4am on Christmas Eve scrambling to get everything wrapped and ready to go in time for Christmas morning. Dec 11th — 2 Weeks Until ChristmasNow that your Christmas shopping is officially handled and decorations are up, you can start prepping for your holiday menu. If you’re hosting this year, decide what you’d like to serve and give any new recipes a test run. Otherwise, choose a dish or two to take to any holiday parties you plan to attend. Season’s greetings cards are also starting to hit your mailbox. Display Christmas cards on your fridge or tape them across a hallway door frame. Or, if you’re crafty, find a creative way to display your cards to help boost the holiday cheer.  Dec 18th —Christmas Is ONE WEEK Away!It’s the final countdown! Believe it or not, there are still a few things left to make those final preparations. If you have any baking to do, get it done this week. You should also finalize your menu for Christmas dinner and do any last minute shopping you need to get ready. Then spend the rest of the time enjoying time with friends and family. Make hot chocolate, watch classic Christmas movies, or drive through neighborhoods to see all the Christmas lights and décor. 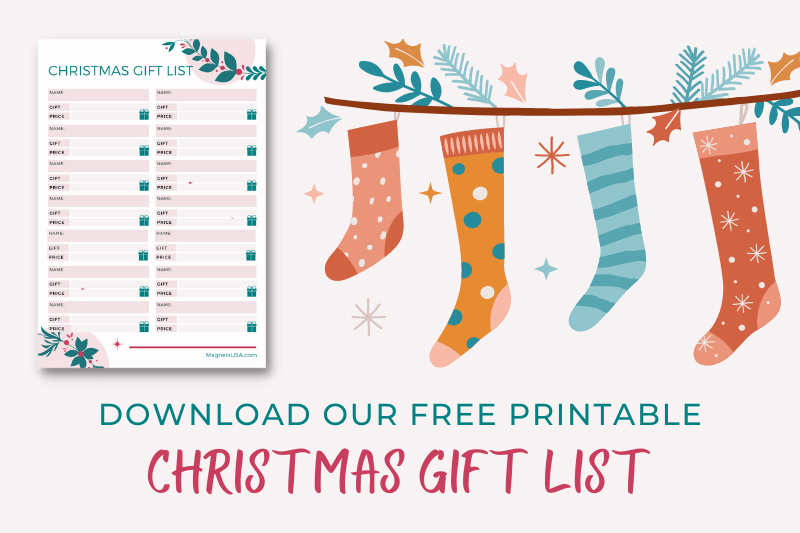 Printable Christmas Gift ListTo assist you with your holiday preparations this year, we created a free printable Christmas gift list to use as a holiday shopping guide. You can download and print this colorful Christmas printable here.
Then use the list to write in the names of your gift recipients, the gift you’ve chosen for them, and the price to help you stay on budget.  Best Website for Holiday Shopping OnlineThere are several great reasons to complete your Christmas shopping online this year. Not only will you avoid the hustle and bustle and parking woes by shopping online, but you can also avoid the crowds. It’s also a great opportunity to create and send personalized gifts that you know are in stock. And, as there’s no worry about driving from store to store to find the perfect gift in stock, you actually save time as well! We may be biased but we think LifeLong Gifts is ideal for your holiday shopping needs. Not only can you create lasting, personalized gifts for friends and family, but we also sell a wonderful collection of products suitable for business client gifts.  What to Give for Holiday GiftsIf you need ideas on what to give as holiday gifts this Christmas season, then be sure to check out our holiday gift guides.
|
|||||
 RSS Feed