
|
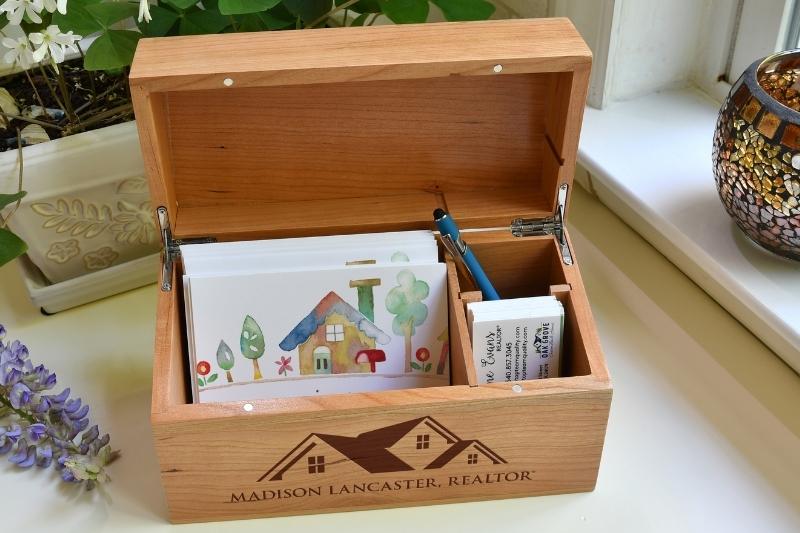
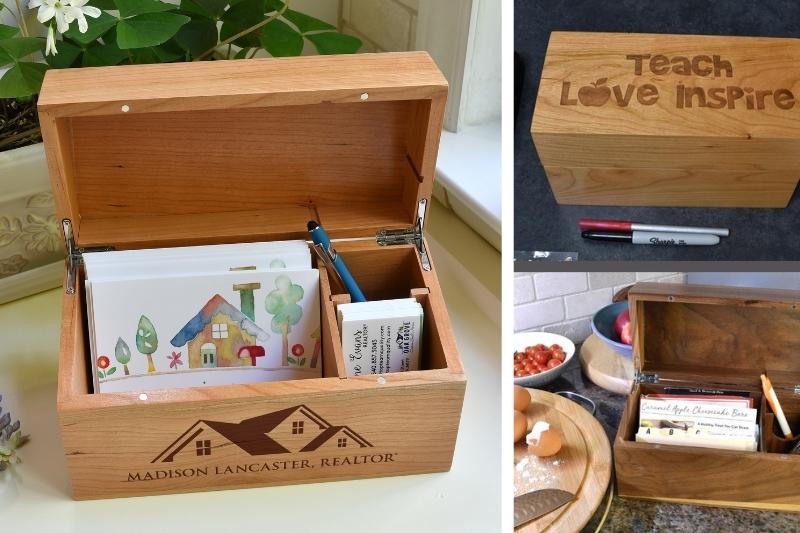
Learn how to make a memory box to mark important occasions in your life, or that of a loved one. Plus, explore our ideas on what to put inside a keepsake box to preserve your memories and important mementos for years to come. 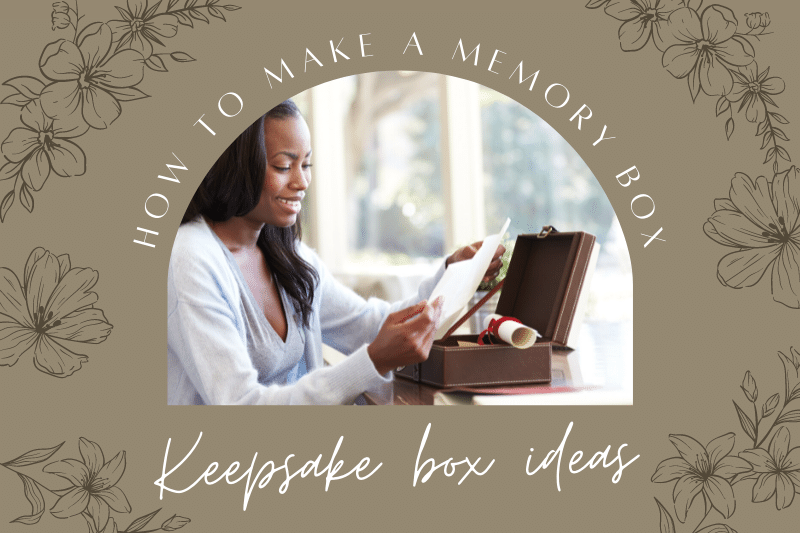 How to Make a Memory BoxIt’s easy to make a memory box for keepsakes related to a celebratory event, to mark a happy period in your life or to remember someone who has passed. Not only will this treasured box hold your memories and keep them safe, but it’s also a wonderful way to revisit these keepsakes later. To create a memory box, all you need is a quality, wooden keepsake box and the materials you’d like to put inside. While you can purchase inexpensive boxes and then decorate them yourselves, we love the quality and personalization available with the keepsake boxes from Magnets USA. These wood boxes are crafted from beautiful American Cherry or Walnut wood. Available in a variety of themes and designs, these boxes and can be professionally engraved as an elegant and easy way to store your most valued treasures, recipes, photographs, and mementos. 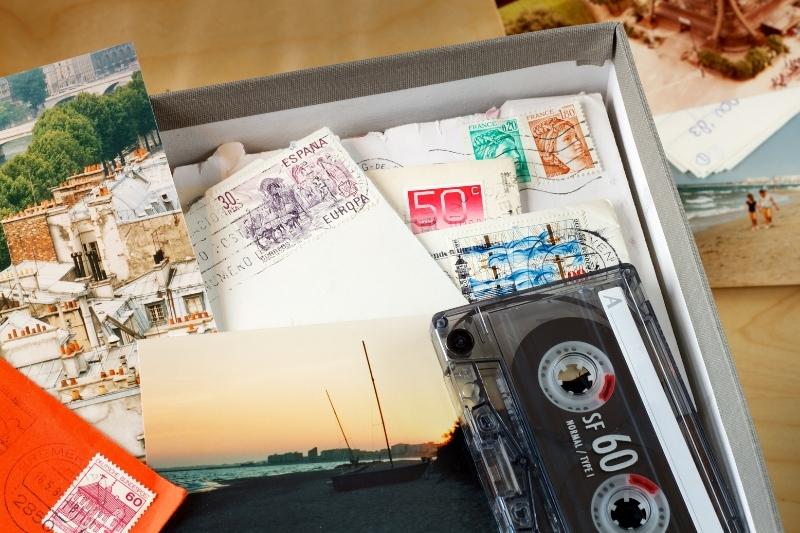 What to Put in a Keepsake BoxWhat you put in a keepsake box depends on the theme you settle on for your memories. In the end, however, it’s all up to you! This is your box! Therefore, you can fill it with anything that’s sentimental or meaningful to you. We love curating our boxes with a theme in mind so that they tell a story. However, you can also slowly add elements that have personal meaning to your keepsake boxes over time. To help you out, we’ve pulled together some great memory box ideas along with suggestions as to what to include inside. We hope you enjoy these ideas for keeping and passing down little treasures of your memories. Memory Box IdeasNeed ideas for memory boxes? Whether you’re creating a keepsake box for yourself or giving one as a personalized gift, these themes are all great choices! 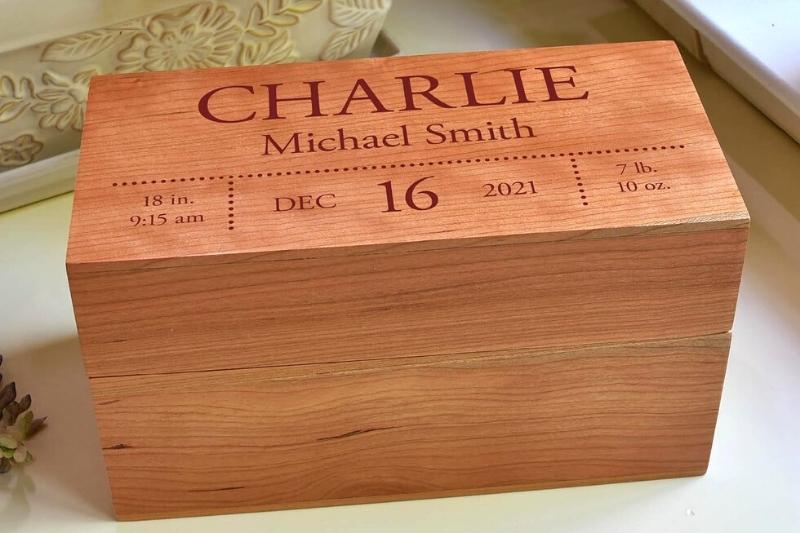 Memory Box Ideas for BabyNew moms will appreciate being the recipient of a memory box for their baby! After all, childhood passes by so quickly, it’s important to mark new milestones to preserve for when they’re grown. While parents will appreciate receiving a memory box for their child, it’s also something they’ll likely fill themselves over time to mark baby’s first year. Common items to include in a keepsake box for a child include a lock of hair, newborn footprints, the hospital wristband, that first pair of baby booties, and physical photographs. You can also include a newspaper announcement from their birth, congratulation baby cards, or a coin from the year they were born. As they grow, things can be added such as a first tooth, a favorite stuffed animal, awards or certificates, artwork, and school pictures.  Wedding Keepsake Box IdeasYour wedding is a day to be remembered. As one of the most important days of your life, marking the occasion with a wedding keepsake box is a wonderful way to reflect back and share those treasured memories. When making a memory box for your wedding, you can include any number of items from the date inside. Things like dried flowers from the bride’s bouquet or the groom’s boutonniere, the wedding cake topper, a garter belt, and a groom’s bowtie are all wonderful choices. You can also add a copy of the vows you wrote for one another along with a copy of your invitation or save-the-date cards or wedding cards you received from guests. Even a napkin or wedding favor make great additions. 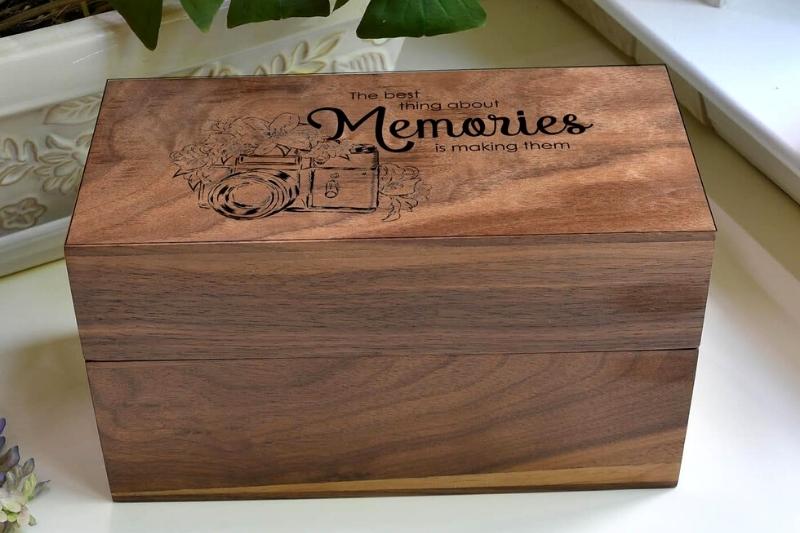 Memory Box Ideas for CouplesSimilar to a wedding memory box, you can also make one for your relationship. Take the time to have your most treasured photographs printed from your phone to put inside so they aren’t lost down the road. You can also include love letters you’ve written to one another, travel journals, and ticket stubs from memorable events. In addition, you can also create a combination wedding/couples treasure box that highlights both trinkets from your wedding and your many adventures afterwards. Anything that highlights your love for another, including those honeymoon souvenirs, are fair game for a fascinating trip down memory lane later in life. 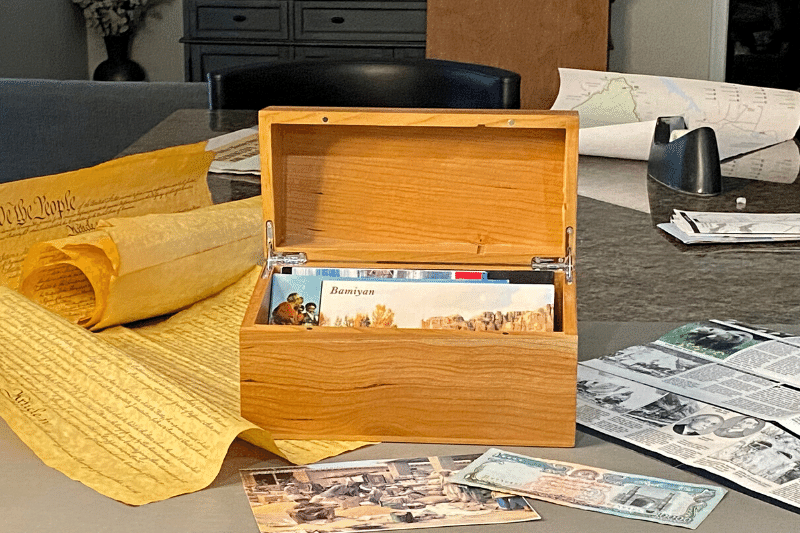 Travel Keepsake Box IdeasWhether you took the trip of a lifetime across the world or simply took that big vacation to Disney, these are the types of memories you want to preserve forever. In addition to physical photographs of your journey, ticket stubs, maps and souvenirs are all easy adds. We also love the idea of including shells from a beach trip, as well as postcards or thimbles from the places you visited.  Memory Box Ideas for GraduationGraduations, and other special occasions, are a big deal. Yearbooks alone often aren’t enough to hold all the memories of school friends and those noteworthy moments from high school or college. Report cards or transcripts from senior year, awards or certificates, graduation cap or tassel, and photos are all great options for a college or high school memory box. And, of course, graduation cards you received from friends and family are another great addition. Birthday Memory Box Ideas Like graduation, birthdays are another great event to celebrate, especially for children as they grow. For a birthday memory box, we like to include tokens from the past year prior to the big day as well as items from your child’s actual birthday. Therefore, you can put birthday cards and candles marking the occasion in a birthday memory box for a child. In addition, you can also add artwork they created or jewelry they recently grew out of, report cards, photographs of sports or activities they participated in – basically anything that’s special to the day or to your child as he or she has grown over the year. Grief Memory Box IdeasWhether you’ve lost a pet or a loved one, grief is hard. Keep the memories you have of that special person or pet alive with a memorial keepsake box. For pets you can keep their collar and tag inside along with a favorite toy. Otherwise, add your favorite mementos from the person you’ve lost. This could be letters and photos, their cherished trinkets or items, or even ticket stubs or their passport that reflect back on their travels and favorite pastimes. You can also tuck the funeral program inside the box along with dried funeral flowers, a printed copy of their obituary, sympathy cards, and any memorial gifts that you aren’t quite ready to process. 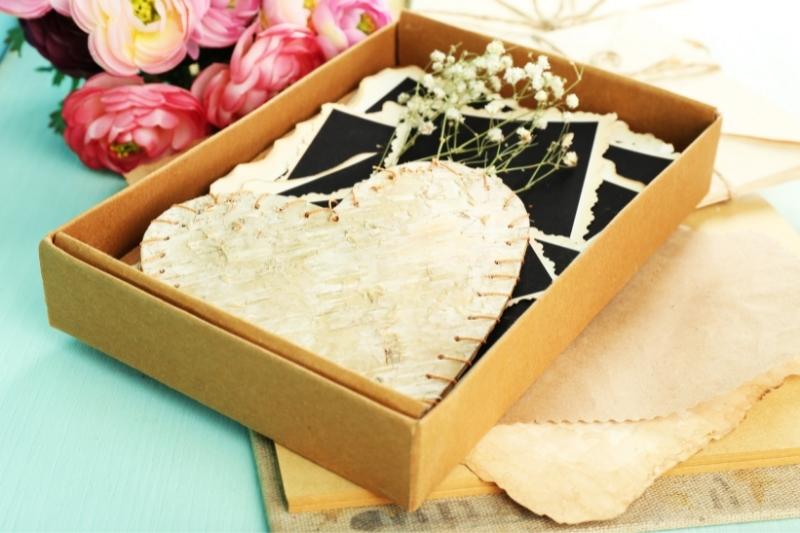 Anniversary Keepsake Box IdeasMark those memorable anniversary dates at 5, 10, 25 and 50 years together with an anniversary keepsake box! Wood is a traditional 5-year anniversary gift. Therefore, you can give an engraved keepsake box as a gift on its own to fill with treasures together. A recent photo to mark the date is the perfect way to kick off this sentimental keepsake. You can also include photos or treasures from an anniversary trip or dinner out, anniversary cards you received from loved ones, a map of your city, photos of your home, love letters to one another remarking on the time you’ve spent together so far, a key to you home, pressed flowers or even a mixed CD of your favorite songs as a couple. 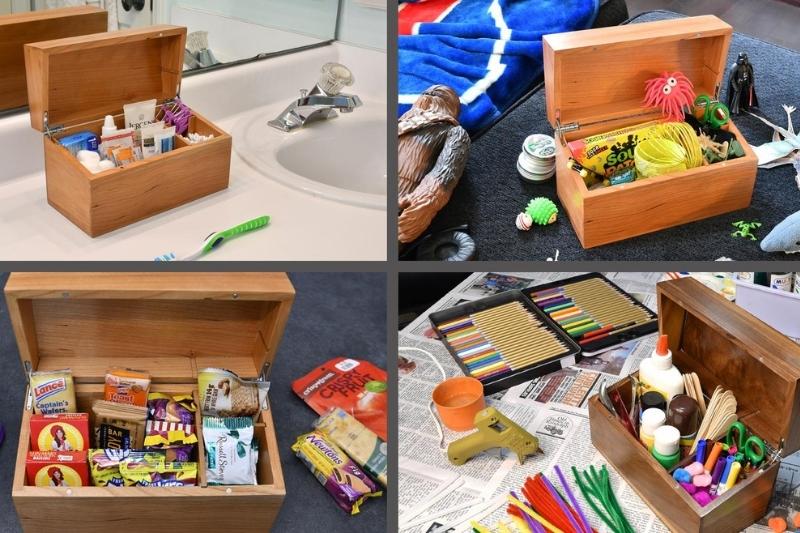 Other Ways to Use Small Wood BoxesOur personalized wooden keepsake boxes can be used for more than just making a memory box. You can also use them for storage and organization. Here are some of our top ways to use our wood engraved boxes in your home.
We hope you enjoyed this post on how to make a keepsake box. To keep up-to-date on new products and sales we offer on our line of personalized products, subscribe to our newsletter. You can also follow us on Facebook or Instagram.
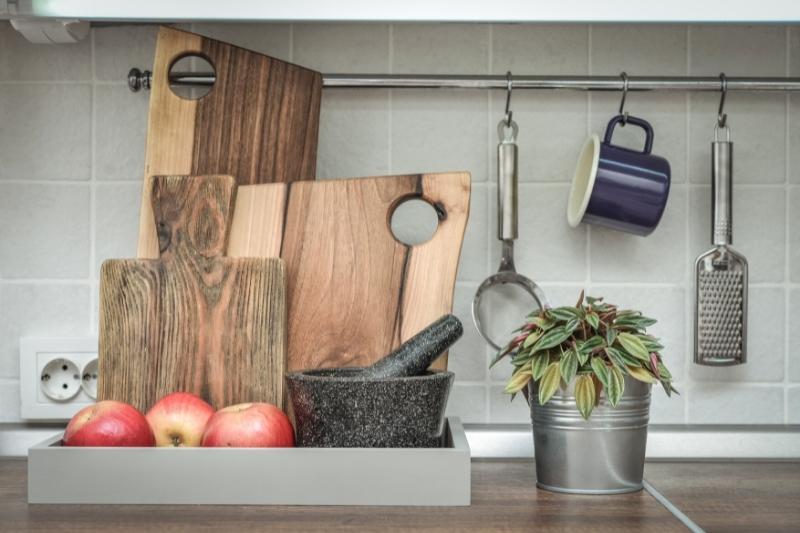
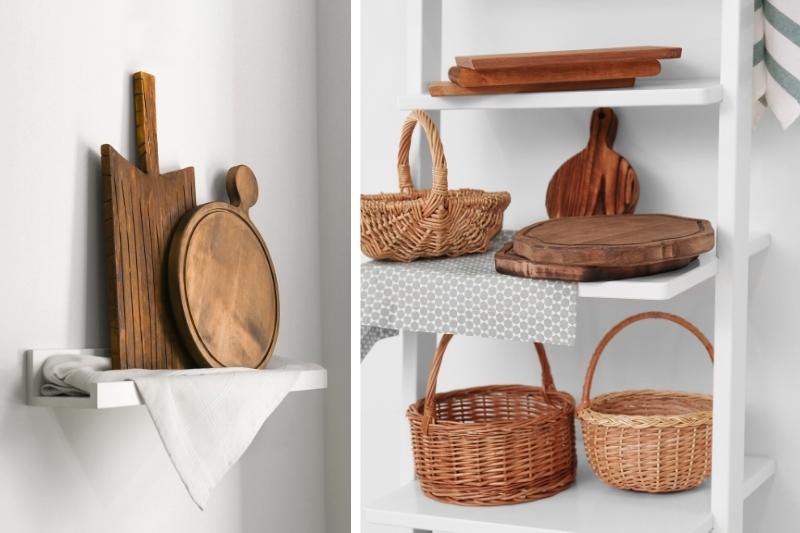
Learn the best ways to store and organize your cutting boards with this collection of easy and practical kitchen storage ideas. 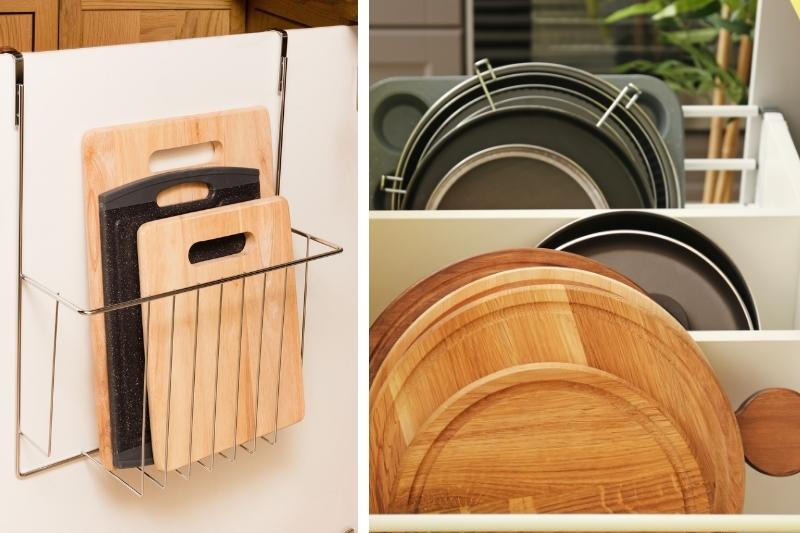 We all use cutting boards in the kitchen. However, unlike cookie sheets, these tools are used more often. Therefore, one doesn’t necessarily want to stash them in cabinet you have to dig through or in the drawer under your oven. Instead, we came up with some great ideas to store a cutting board for easy access.  Cutting Board Storage IdeasThere are lots of great ways to store cutting boards in your kitchen. The awesome thing about this is that there’s no right or wrong way to store your boards! Whether you display them on a counter or tuck them away in a drawer, these cutting board storage ideas fit every lifestyle, space, or need. Where to Store Cutting Boards in the KitchenAt the end of the day, the best way to store cutting boards is up to you! Following are the top ways to store and organize cutting boards in your kitchen. 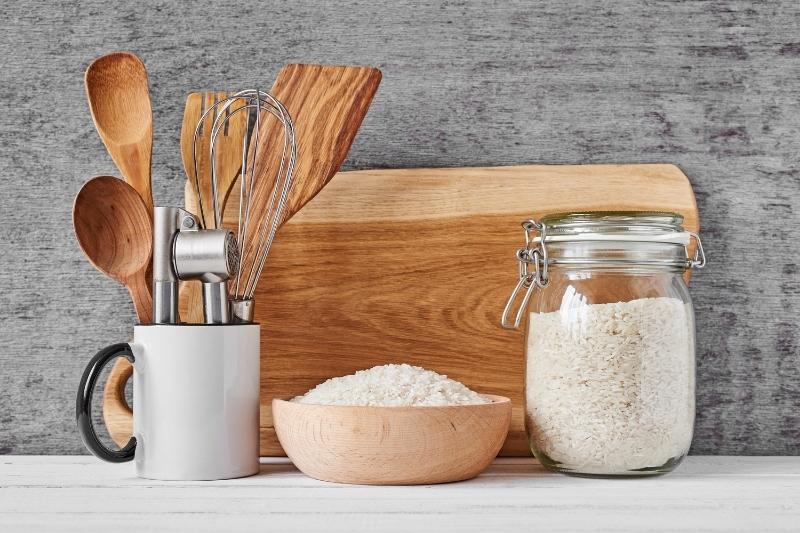 How to Store Cutting Boards on the CounterIf interior drawer or cabinet space isn’t an option, keeping your cutting boards on your countertop is a simple solution when can’t just hide them. Here are some easy ways to store cutting boards on the counter to reserve your cabinet space for other needs.
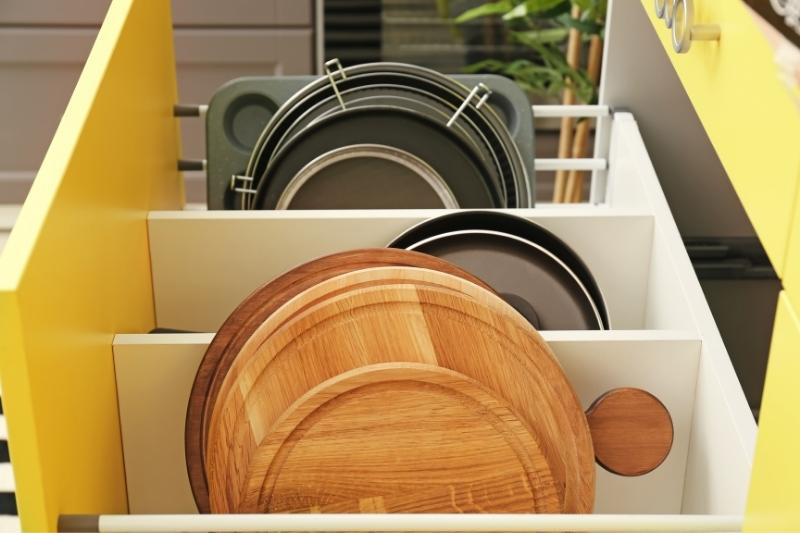
Organize Them Inside Drawers or CabinetsIf you have adequate space inside your kitchen drawers or cabinets, you can utilize these easy solutions to keep your cutting boards organized and accessible.
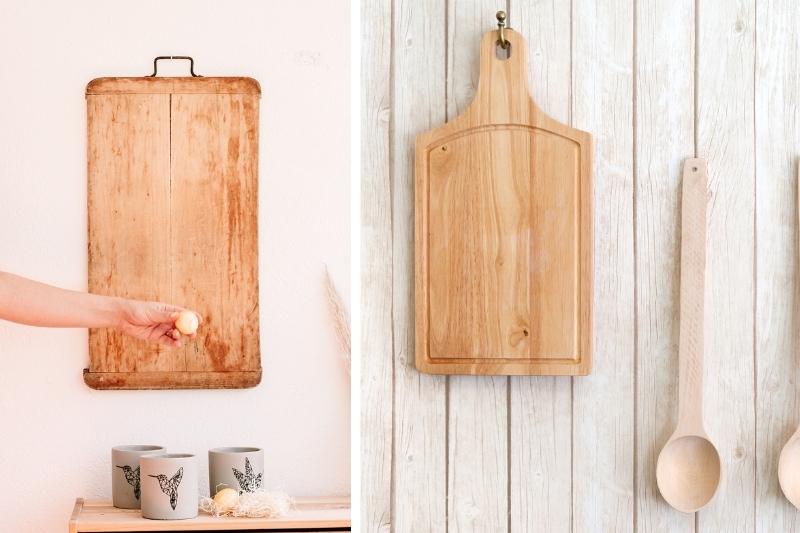 Display Them on the WallIf you like to keep your countertops free of clutter and are limited on storage space, you can display your cutting boards on the wall. This provides easy access without taking up existing space you need for other kitchen tools.
 Best Way to Store Cutting BoardsThe best way to store cutting boards is vertically, rather than horizontally. This is especially important if you have wooden cutting boards rather than plastic ones. Of course, if you are using your boards on a daily basis, this is less of a concern. So don’t stress if you store your boards flat on your countertop or in a closed drawer. Why Should You Store Cutting Boards Vertically?While it’s not imperative that you store your kitchen cutting boards vertically, it is advisable for wood cutting boards. By keeping your boards in an upright position, it helps to prevent moisture from getting trapped underneath and possibly warping the boards. It also helps to keep your cutting boards clean as it’s more difficult for dust to accumulate on the surface when stored vertically. When Should You Replace Your Cutting Board?While you can store your cutting boards into eternity, that doesn’t mean that you should use them. Cutting boards don’t last forever. And the less expensive they are, the more frequently they need to be replaced. 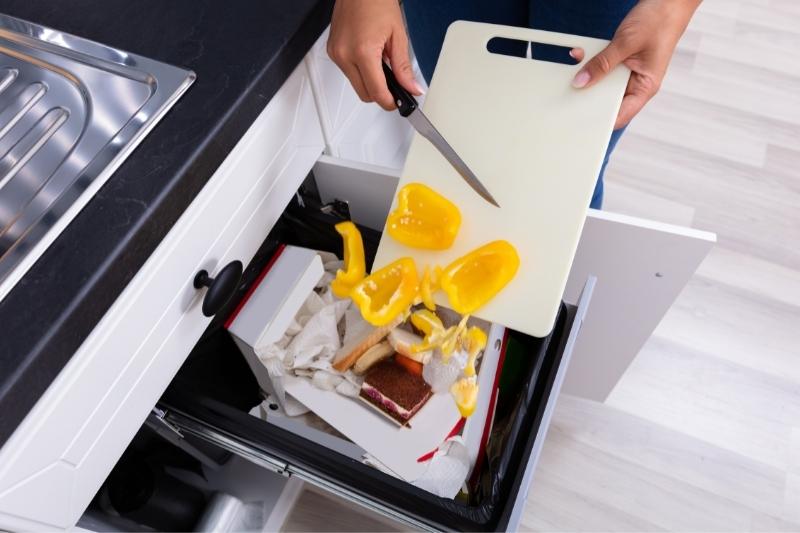 How Long Do Plastic Cutting Boards Last?Typically, plastic cutting boards need to be replaced every year, though in some cases they may last up to 5 years. If you don’t cook from scratch often, then you may get extra life from your boards. However, in general, they should be replaced when they start to look worn or have noticeable damage from use, such as scratches or deep grooves. Plastic cutting boards can harbor unsafe bacteria once they become damaged. They also scar more readily than wood cutting boards, which contributes to their need for more frequent replacement over their wood counterparts. 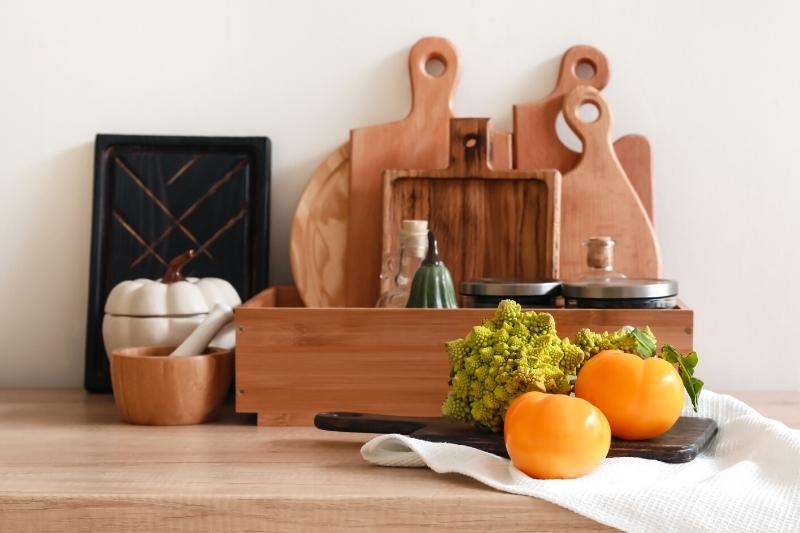 When Should You Throw Out a Wooden Cutting Board?Wood cutting boards greatly outlast their plastic brethren. On average, you can use a wooden board for a span of 4 to 7 years before it needs to be replaced. However, a quality cutting board that is well cared for and regularly maintained can last ever longer. Unlike plastic, wood is self-healing and therefore more resistant to developing scars or grooves. Studies also show that wood has natural antibacterial properties. The combination of these properties, in addition to the board you choose, can result in a much longer life for this vital kitchen tool. As with plastic, wooden cutting boards should be thrown out when they become cracked, look excessively worn or are marred with deep grooves that make cleaning them a challenge. (This is assuming the surface can’t be refurbished by sanding it down.) 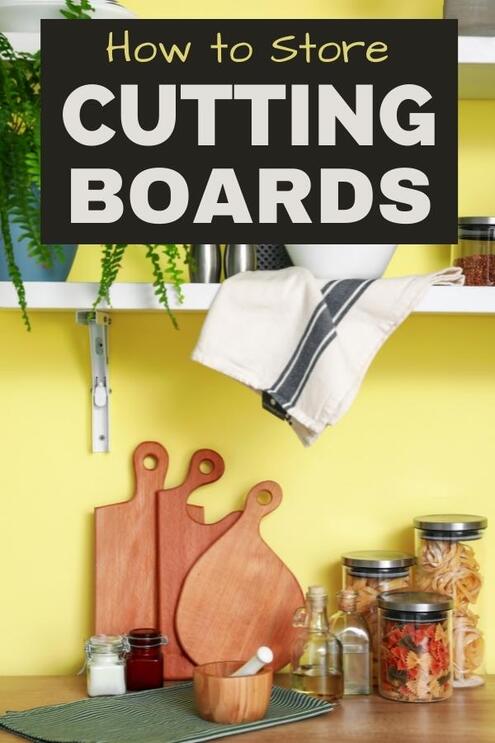 How to Choose the Perfect Cutting BoardLooking for the perfect cutting boards for your kitchen? Be sure to check out our post on how to choose a wood cutting board. In addition to the properties you should look for when making a selection, we also share information on how to properly care for your chopping boards to extend their life. Plus get ideas for giving wooden cutting boards as personalized gifts.
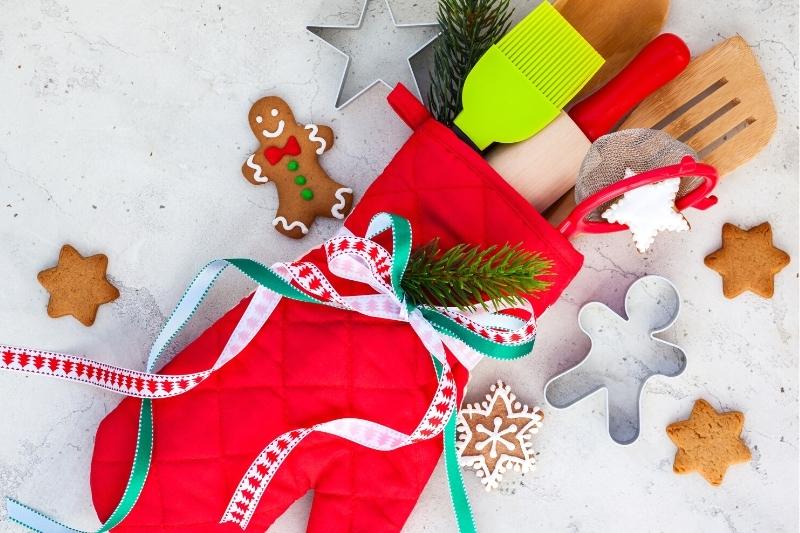
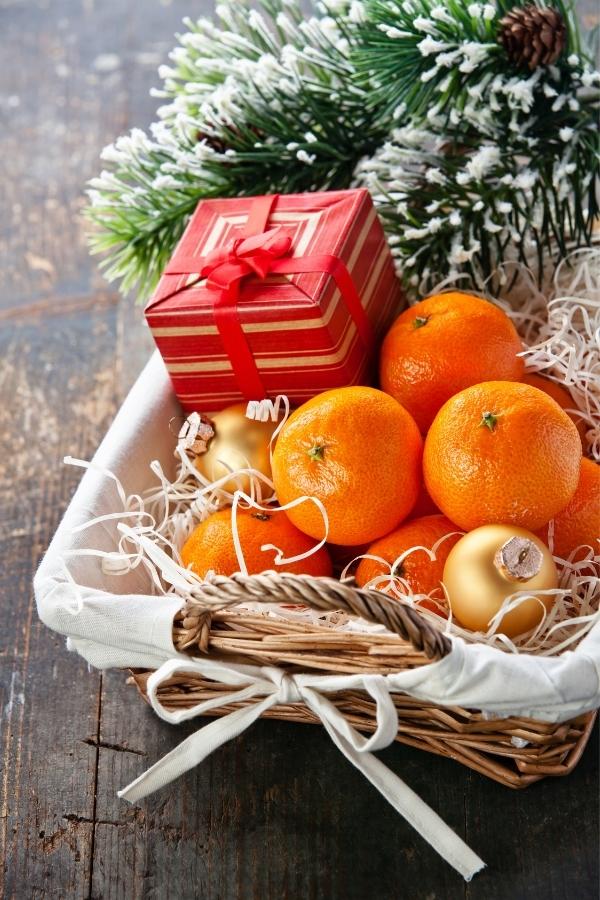
One of the biggest struggles during the holiday season is figuring out what to give clients for gifts. Luckily, we’re here to help with some handy tips! Learn how to build holiday gift baskets for your top clients. Plus, explore our ideas for client holiday gift baskets to help you take the guesswork out of your customer Christmas gifts. 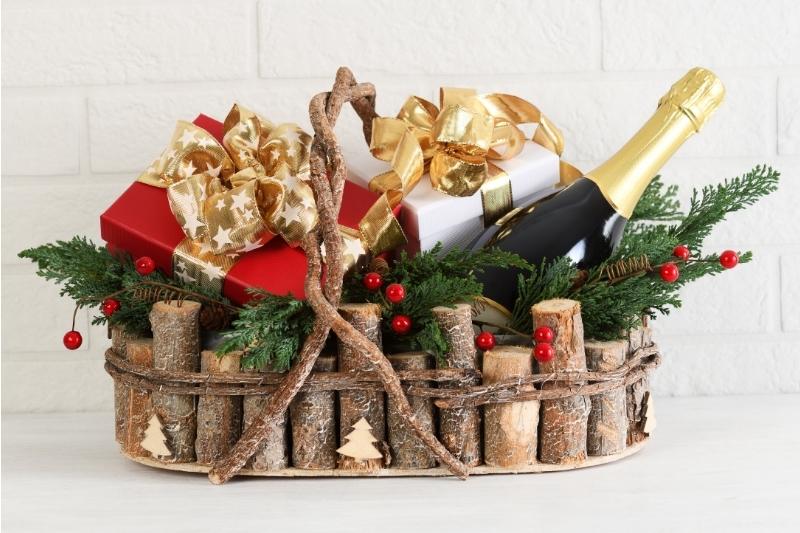 What Do You Put in a Client Gift Basket for Christmas?What you include in a client gift basket largely depends on the customer. We think it’s important to personalize the gift for the customer. This makes it unique to them and ensures that your present contains things that they would enjoy. However, if you are putting together baskets in bulk with a holiday theme, you can use the same elements for each one. Just be sure that you cater your client holiday gifts for the crowd you’re targeting. This means, that if your clientele consists of foodies, give kitchen themed items. A self-care or spa themed gift basket is perfect for women who enjoy extra pampering. Or gift sports fans baskets with collegiate themed products. What you don’t want to do is give a wine and cheese basket to someone in recovery. If you are giving baked goods or other food gifts, take care when making your selections. You want to avoid any potential food allergies that clients may have.  Gift Basket Gift Ideas for Real Estate ClientsHere are some popular elements that real estate agents and other industry businesses use for their holiday client gift baskets:
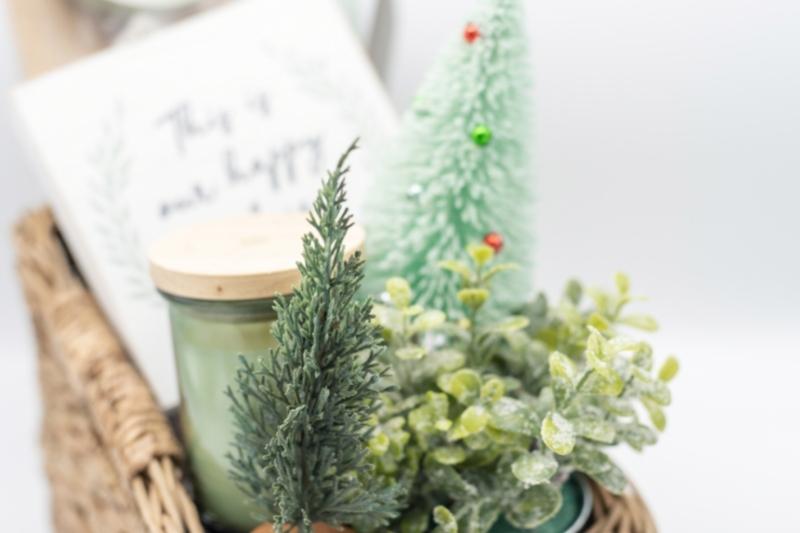
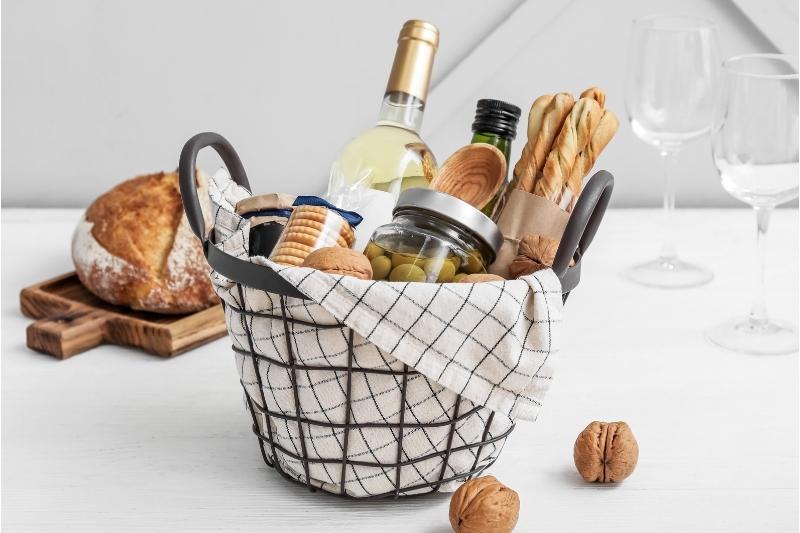
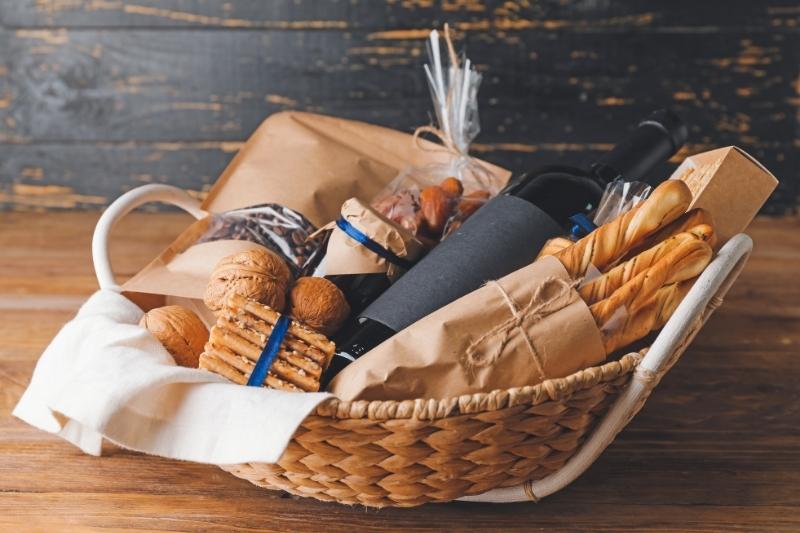
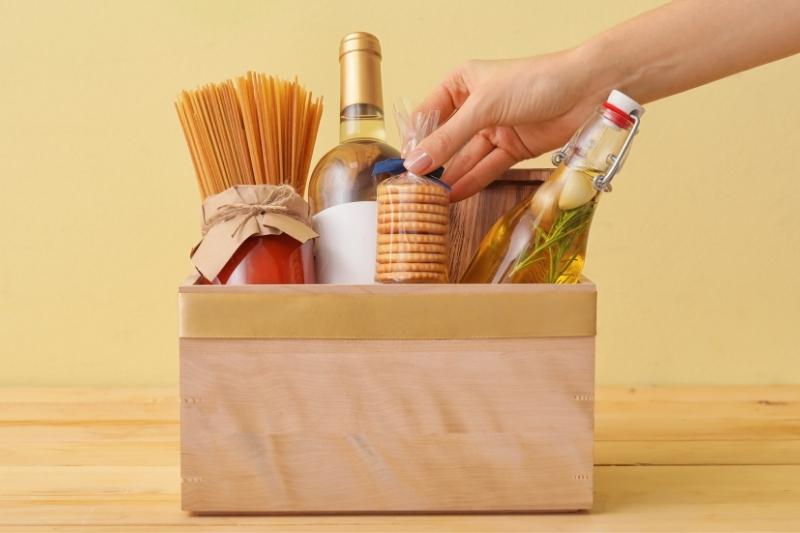 How to Build a DIY Christmas Gift BasketWhen creating a REALTOR® gift basket to give as holiday gifts, the last thing you want is for it to look sparse or incomplete. Therefore, we’ve pulled together our top tips for building a beautiful gift basket for the holiday season. 1. Plan AheadBefore you start shopping for items to put in your client gift basket, it’s important to plan ahead. Decide on the theme you’d like to use for all your holiday gift baskets. Or write out a list of your clients with their interests to create a personalized real estate agent gift basket for each customer. This makes shopping for your gift basket components both faster and easier. It also gives you more time to take advantage of seasonal sales and special offers, especially if you’re on a budget. 2. Determine How Many Items Should Be in the Gift BasketUltimately, the number of customer Christmas gifts you include in your gift basket is determined by the both the size of the basket and the size of your gifts. We recommend you include 4-5 items in a small gift basket. For a medium-sized REALTOR® gift basket, choose 7-8 items. Finally, we suggest you pick 10 or more products for a large basket. 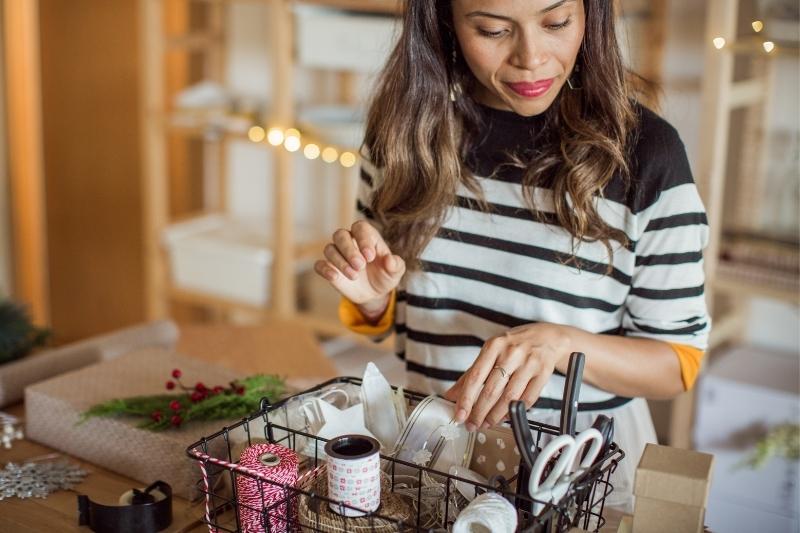 3. Buy the Gifts and SuppliesOnce you’ve determined what to include in your gift baskets, then you need to buy the gifts. You can also make homemade gifts if you’re extra crafty. In addition to the presents you’ll be using, don’t forget to shop for the baskets and filler, cellophane wrap for the baskets, and decorative ribbon. 4. Assemble the Holiday Gift BasketsThe next step after you’ve gathered all the material and supplies you need, is to assemble your gift baskets. 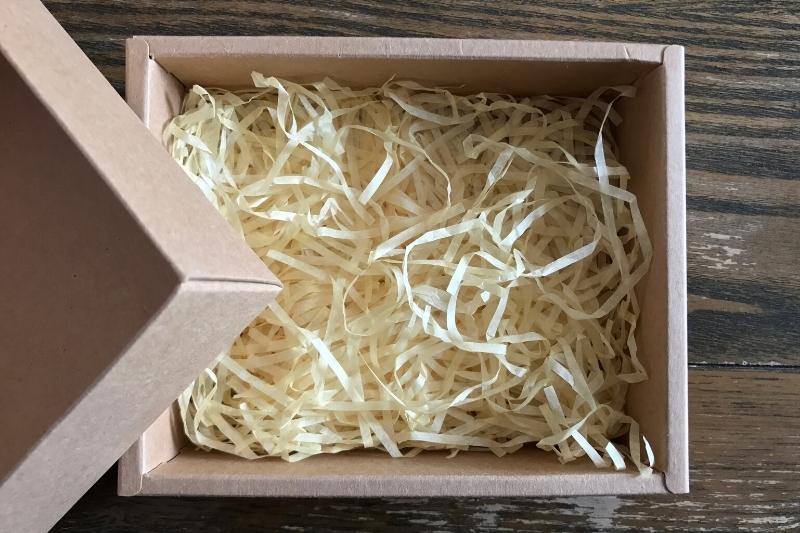 Add FillerYou want to use filler in your holiday real estate gift baskets to form a base for your gifts. Filler also helps to cover any elements you use to give your gifts baskets additional height. As this is a professional basket for clients, we advise you don’t use crumpled or shredded newspaper as filler. It is also helpful to color coordinate your filler with the overall theme of the basket. Here are some ideas of the types of filler you can use to build holiday gift baskets for customers:
Densely pack the filler you choose to ensure you have a sturdy base for the contents. We recommend you pack the base of basket three-quarters of the way full if you’re using large items. For smaller gifts, fill the basket to the top. 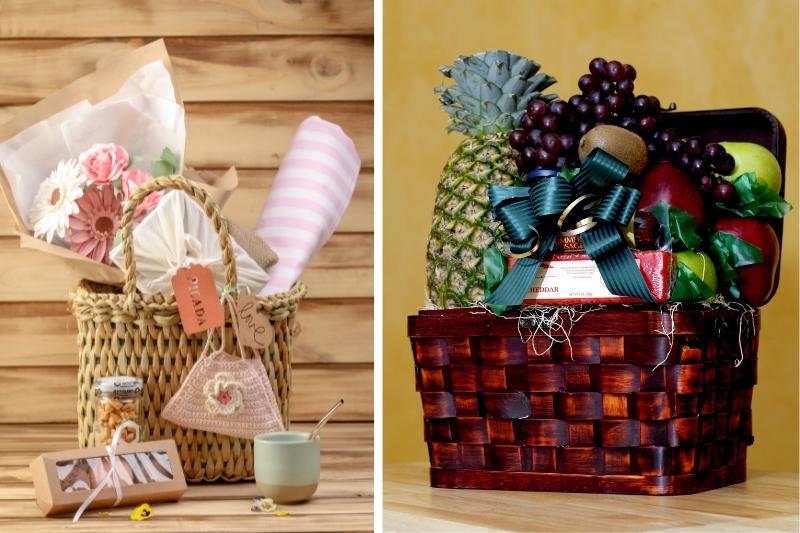 How to Add Height to a DIY Christmas Gift BasketElevating the components inside your Christmas gift basket will help to create the perfect presentation. There are several ways to add height to a gift basket. The easiest way to do this, however, is to add elements to the bottom of the basket to boost the products you include inside. Here are several ways to boost the height of the components in your container:
Secure the Items InsideWith the elements arranged, you now need to secure the items in your gift basket. 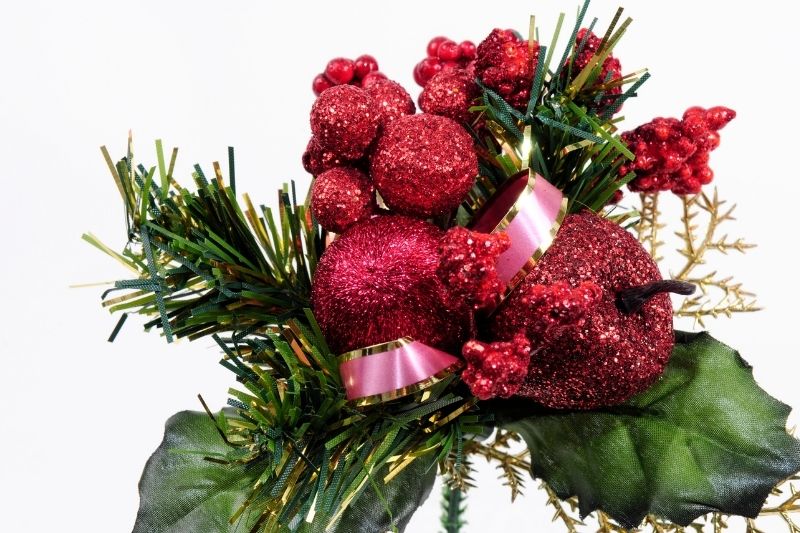 To do this, you can stuff the filler around the items for a tighter fit. In addition to employing filler to hide holes, you can also mix it up by using silk flowers, scented pinecones, Christmas themed floral picks, holiday greenery, or other embellishments. Furthermore, you can also use a low temperature hot glue gun to adhere items together that don’t want to stay in place. If you don’t have a glue gun, glue dots and tape work as well. 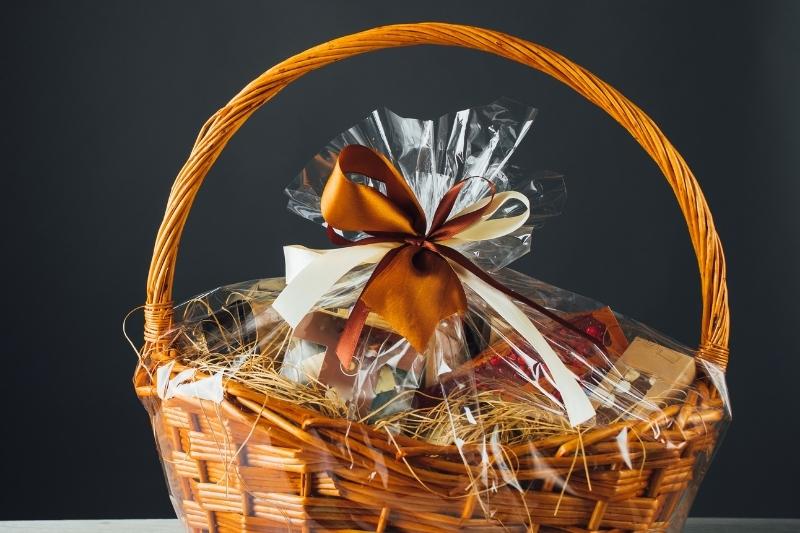 Wrap the Gift Basket for Your ClientFinally, wrap your client gift basket with clear cellophane. Then tie off the top with a ribbon. If desired, you can heat the cellophane with a blow dryer on the lowest setting to shrink the plastic around the client holiday gift basket. Alternately, you can also wrap the basket, depending on the size, with a tea towel or picnic blanket. Or try using a sheer fabric, such as tulle from your local fabric store. If you’re incorporating large items in your gift, that stay in place easily, you can skip this step. 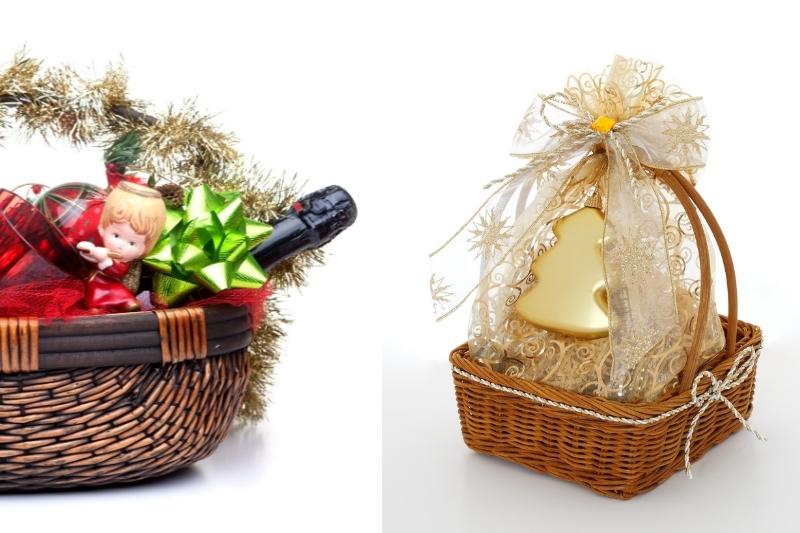 Add EmbellishmentsYou can decorate your client gift baskets to make them unique. Tie a Christmas ornament onto the basket handle nestled in with the bow. Or wrap Christmas garland around the handle in lieu of using ribbon. What Can I Use Instead of a Gift Basket?Just because you’re making a holiday gift basket doesn’t mean you have to use an actual basket for the components. There are all sorts of other containers that can be repurposed for this use. We love choosing a functional and useful alternative to traditional baskets. Here are some of our favorite alternate vessels you can utilize for this purpose:
 Unique Holiday Gift Basket Ideas from REALTORS®If you’re looking for unique holiday gift baskets to give your clients this Christmas, consider some of these popular gift basket themes:
 Can REALTORS® Give Gifts to Clients?Yes, you can give your real estate clients a holiday gift basket. This is assuming that you aren’t giving a gift in return for a favor or kickback. Section 8 of the Real Estate Settlement Procedures Act (RESPA) states that “no person shall give and no person shall accept any fee, kickback, or thing of value pursuant to any agreement or understanding, oral or otherwise, that business incident to or a part of a real estate settlement service involving a federally related mortgage loan shall be referred to any person.” In short, this means that if you are giving a gift as a thank you without any strings attached, it’s perfectly fine. (You can read a more in-depth explanation of this and similar rules here.) Can You Deduct Gifts to Clients on Your Taxes?Yes! You can deduct client gifts on your taxes. However, the IRS does have limits on the amount you can use as a deduction. In general, you can only $25 for gifts per recipient each calendar year. The exception to this is entertainment themed gifts, such as tickets. For this type of gift, you may deduct $50 per year for each client. There are some exceptions to this, however. Branded gifts with your business information can potentially be written off at 100%. This is because they are considered a promotional or advertising expense. However, we recommend that you check with a tax professional in your area or state for clarification before making any purchasing decisions. 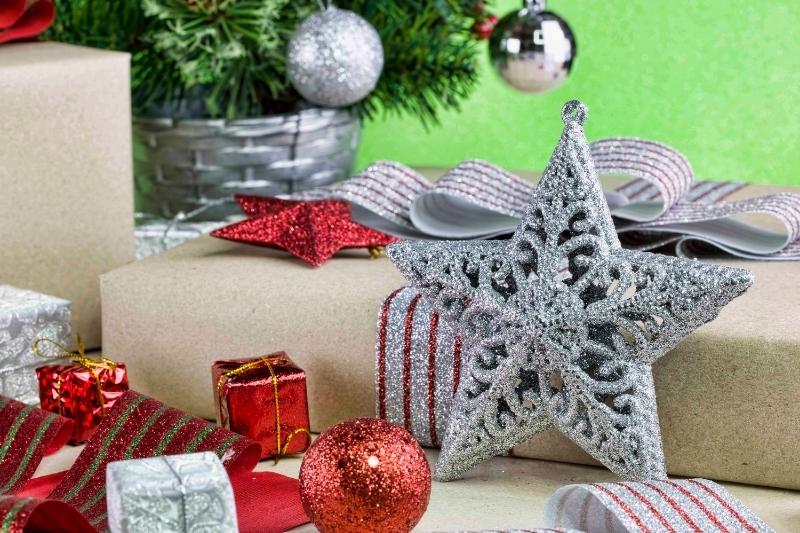 We hope that you find these ideas for making holiday client gift baskets useful! For more gift giving tips, also be sure to check out our holiday client gifts! This corporate gift guide is filled with lots of great personalized, client gift ideas for Christmas.
For more information on great custom client gifts, subscribe to our newsletter. You can also follow us on Facebook and Instagram. Learn how to carve pumpkins for your Halloween decorations this fall. This easy guide provides tools, tips, and ideas to help you plan and create the perfect jack-o-lantern. 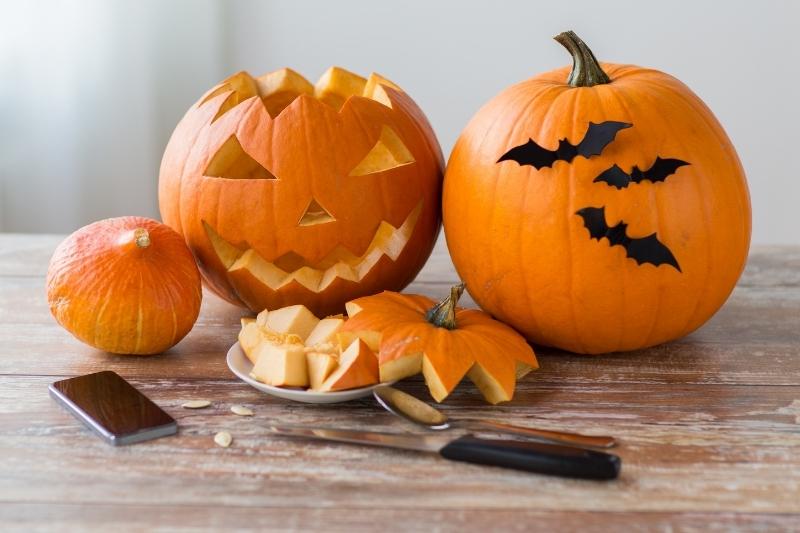 This is the year to become a pumpkin-carving pro. A jack-o'-lantern ace. A prince or princess of the patch. But you won't be able to succeed alone. No, you'll need an army of carefully crafted cutlery and insider intel. Luckily, we've got some great pumpkin carving tips to help you get started! Where Did Pumpkin Carving Originate?The custom of carving pumpkins to create jack-o-lanterns is believed to have originated in Ireland. Residents in parts of Ireland and the Scottish Highlands originally carved turnips and field beets, called mangle-wurzels, with grotesque faces to frighten off a drunkard from an Irish myth called Stingy Jack. Prior to his death, it’s believed that Jack tricked the devil over a deal for monetary gain. When he died, he was denied entry into heaven. At the same time, the devil, upset by Jack’s constant trickery, also refused him admittance. As a result, Jack was sentenced to roam earth for all eternity. When Irish immigrants came to America, they brought this tradition with them. However, they chose to carve pumpkins for this purpose as they were native to the region. 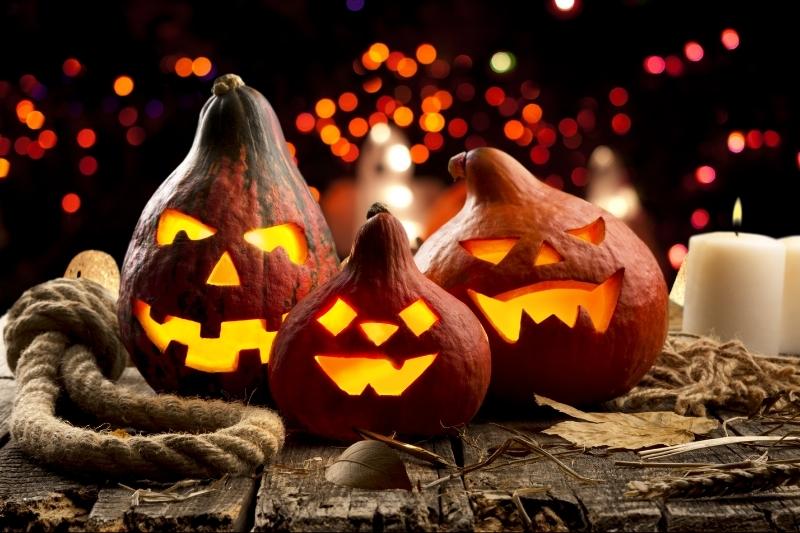 The Celtic festival Samhain marks the end of summer and the beginning of the new year on November 1st. During this time, it’s believed that souls who had died would return to visit their homes. When the Roman Catholic Church moved All Saints’ Day to the first of November, All Hallows’ Eve fell on the day prior. Keeping with Samhain tradition, people began to wear disguises to hide themselves from wandering ghosts. Around the same time, the tradition of carving turnips to ward off Stingy Jack was also incorporated into the holiday to ward off evil spirits. 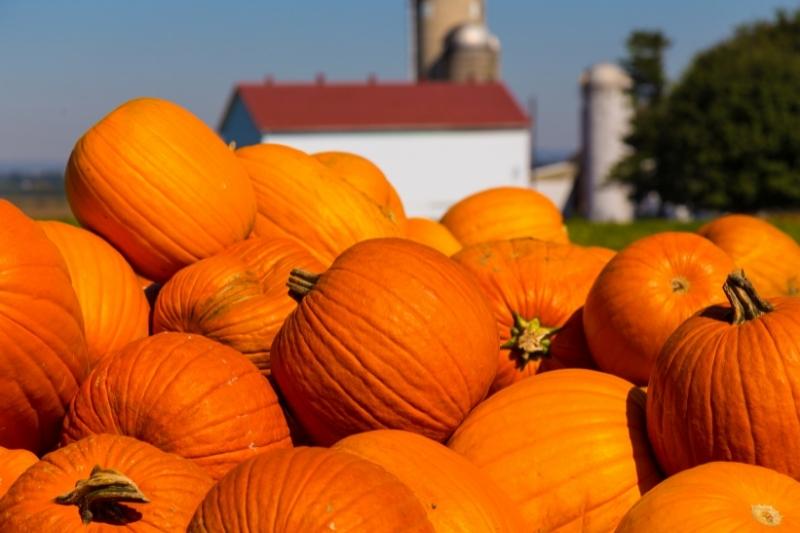 What is the Best Pumpkin for Carving?Before you carve a jack-o-lantern, you need to pick a pumpkin. You want to choose a carving pumpkin, rather than one meant for pies for the best results. Carving pumpkins have a thinner rind that’s well suited for carving. They also have less flesh on the inside. Jack-O-Lantern pumpkins are the best, and most popular, type of pumpkins for carving. They have thin walls that make them easy to cut. Plus, they’re readily available throughout the season at most grocery stores. Assuming you don’t have the chance to visit your local pumpkin patch. Other suitable pumpkins varieties you can use include:
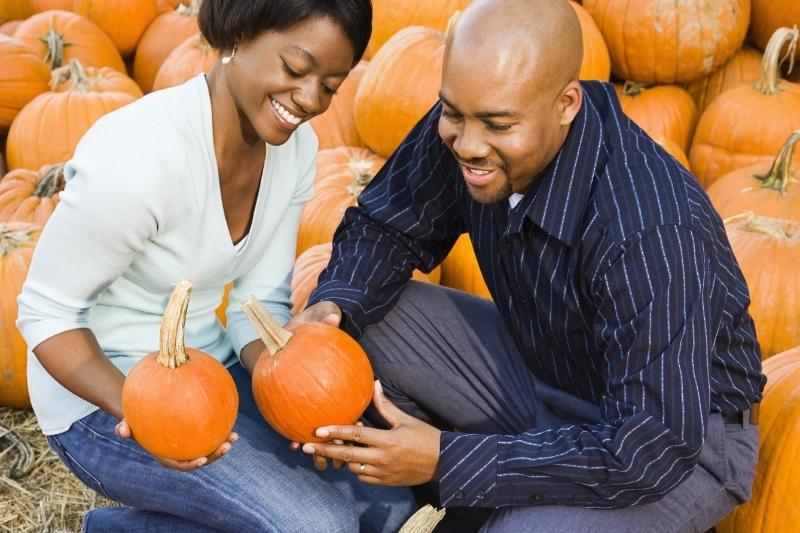 How to Pick a PumpkinFollowing are some easy guidelines for picking pumpkins to carve:
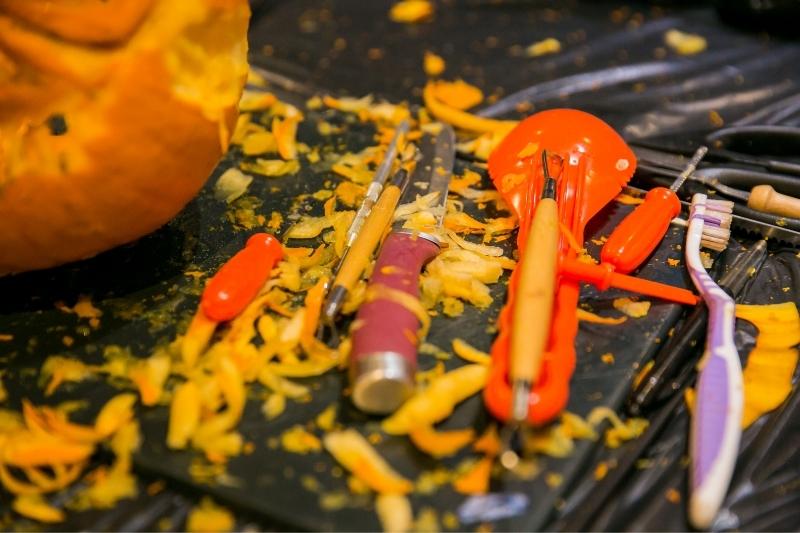 Best Pumpkin Carving ToolsBy choosing the best pumpkin carving tools to create your jack-o-lanterns, you’re more likely to succeed in designing the perfect Halloween décor. Here are the top tools for carving unique pumpkin designs.
 Pumpkin Carving Tips and TricksNow that you know how to choose the perfect Halloween pumpkin for carving, here are some tips to get the job done!

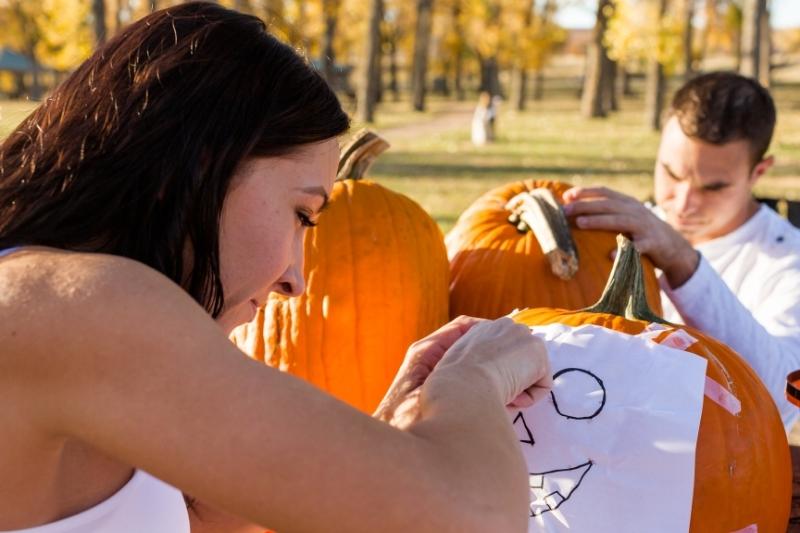
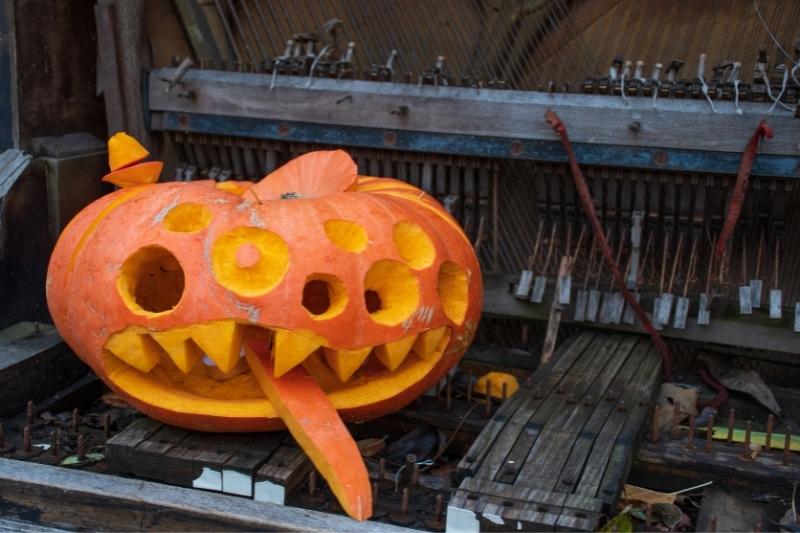
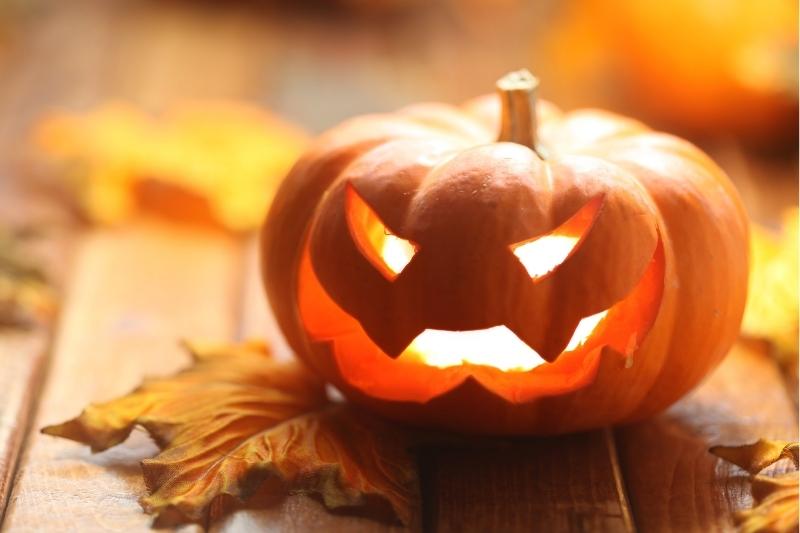
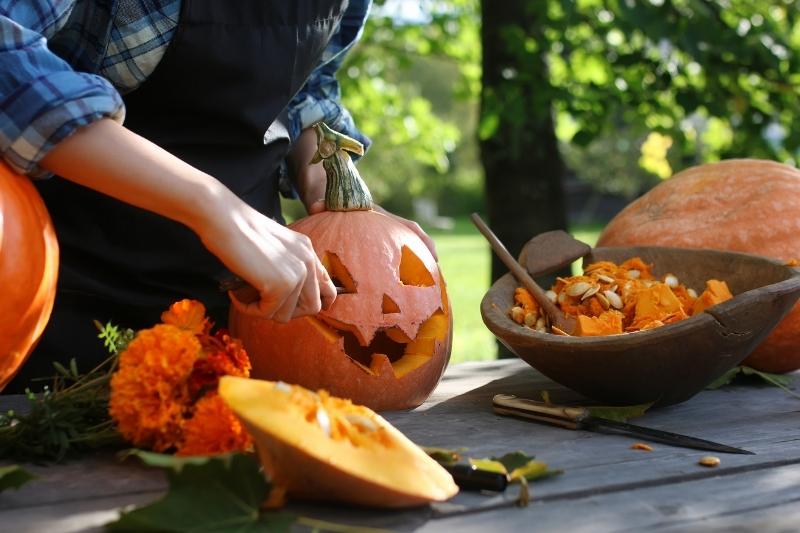
How to Carve Pumpkins for HalloweenReady to carve a jack-o-lantern? Here is how to carve your pumpkin for your Halloween decorations. 1. Choose the tools you need for your design. While a sharp knife is a must, you may also want to use some of the other instruments we mentioned previously to help you successfully execute your design. 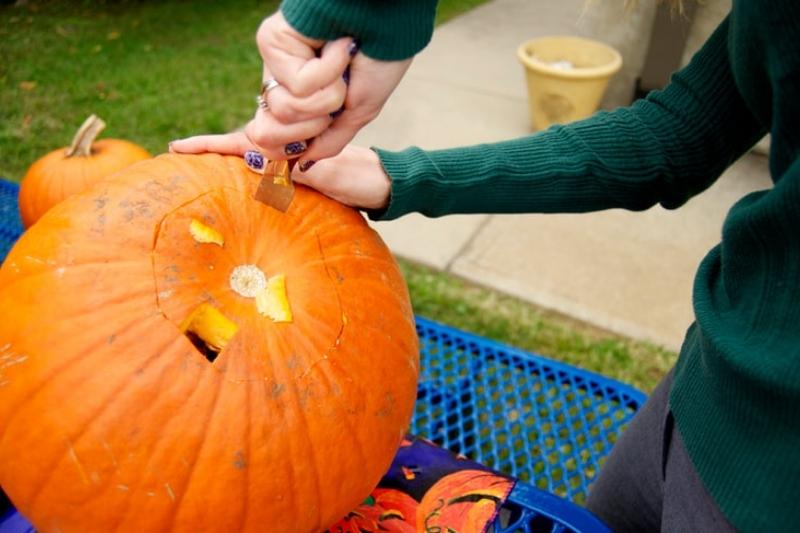 2. Start at the bottom of the pumpkin. Rather than cutting a hole around the stem to remove the top, make one at the base of the pumpkin instead. (If you're using a real candle, then cut a hole in the top for ventilation.) 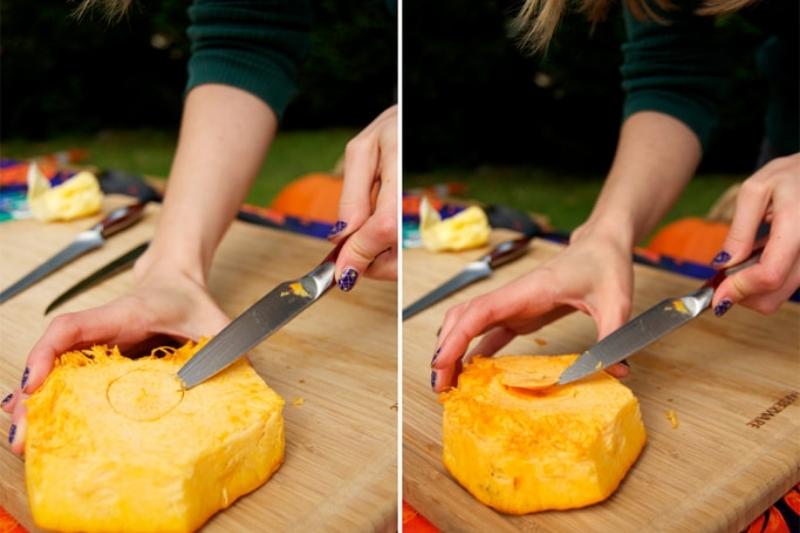 This way, you can place the pumpkin over the light, instead of having to reach inside the pumpkin to position the battery operated candle. Pro tip: With your paring knife, carve an indention for the LED tea light to sit comfortably. 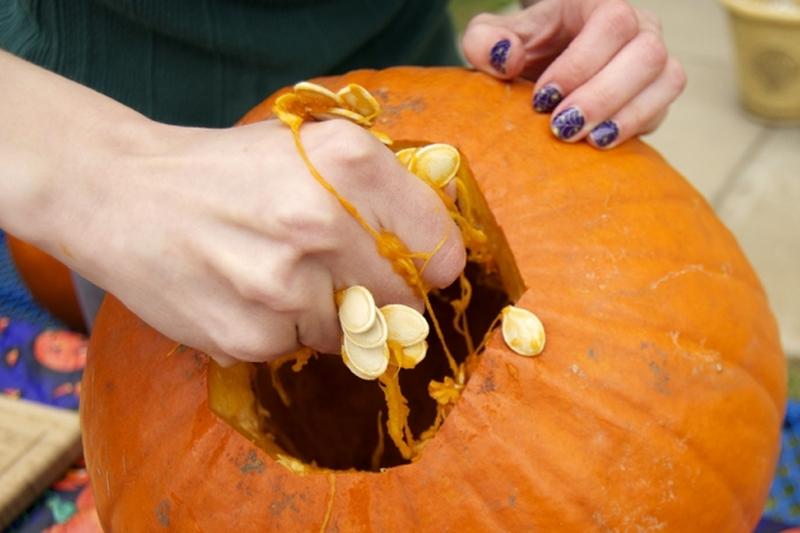 3. Remove the pumpkin guts. Arguably the best part of carving a pumpkin, removing the insides is the time to conjure that messy kid you used to be. So roll up your sleeves, put on your game face and go for it. You can wear gloves for this step, if desired. We recommend using you hands first to remove the loose material. Then try one of the suggested tools from scraping out the excess. 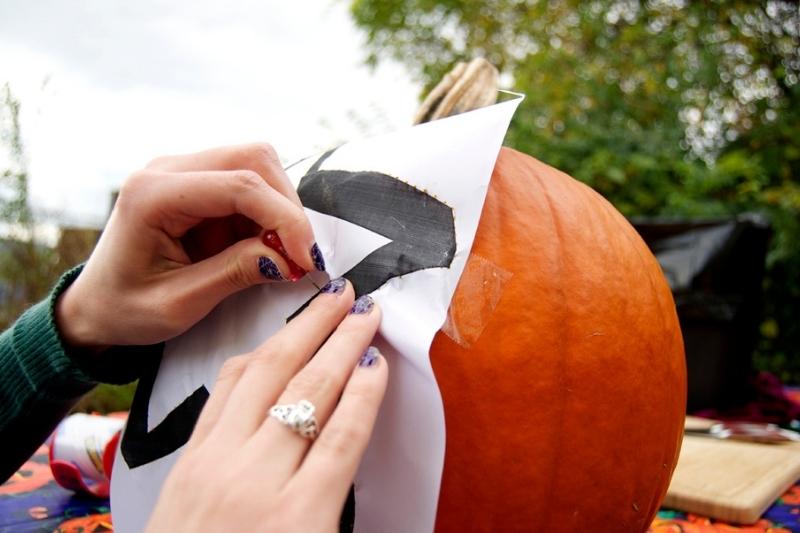 4. Use a needle tool to trace your design onto the pumpkin. With your design taped to the pumpkin, use a thumbtack to establish an outline. When it comes to jack-o'-lanterns, staying inside the lines is a good thing — and will help prevent your freaky Frankenstein or cackling cat from becoming one terrifying blob. 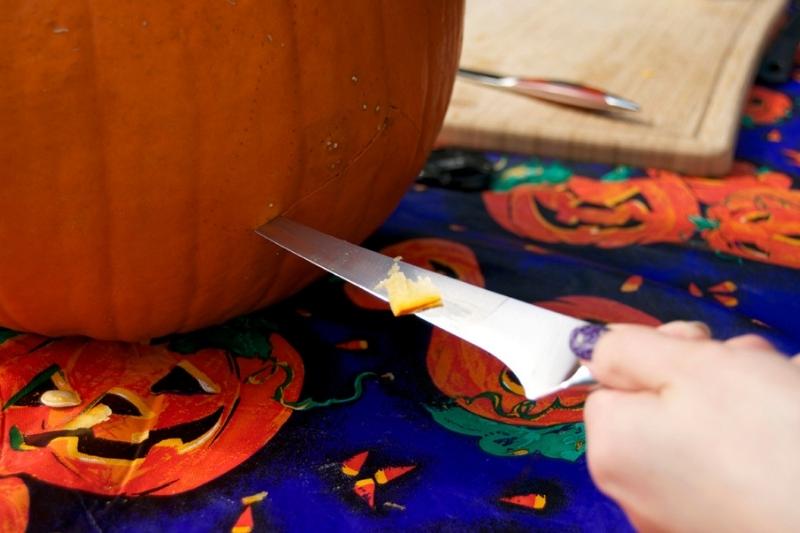 5. Make thoughtful, strategic cuts. We suggest starting with the smallest parts of your design. The paring knife, which features a short, easy-to-control blade, is a great detailing knife. For the larger sections, we found that the filet knife, with its thin and flexible blade, was best. 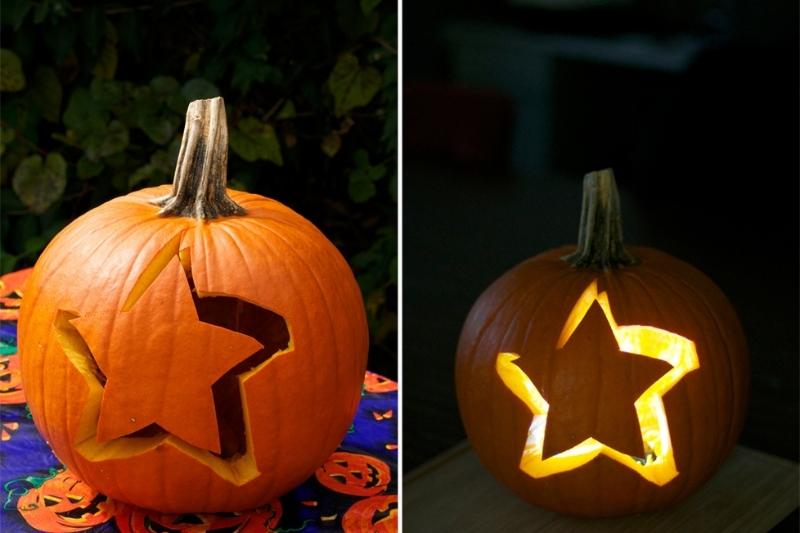 6. Polish off your jack-o-lantern design. When you're finished cutting and all the pieces have been removed, it's time to add the finishing touches. Use your paring knife to carefully shave any ragged edges or remove stray guts. Jack-O-Lantern Design IdeasNeed design ideas for your Halloween pumpkins? Here are just a few designs you can try whether you're a beginner or a seasoned pumpkin carving pro! Simply scroll through the slideshow to see them all. 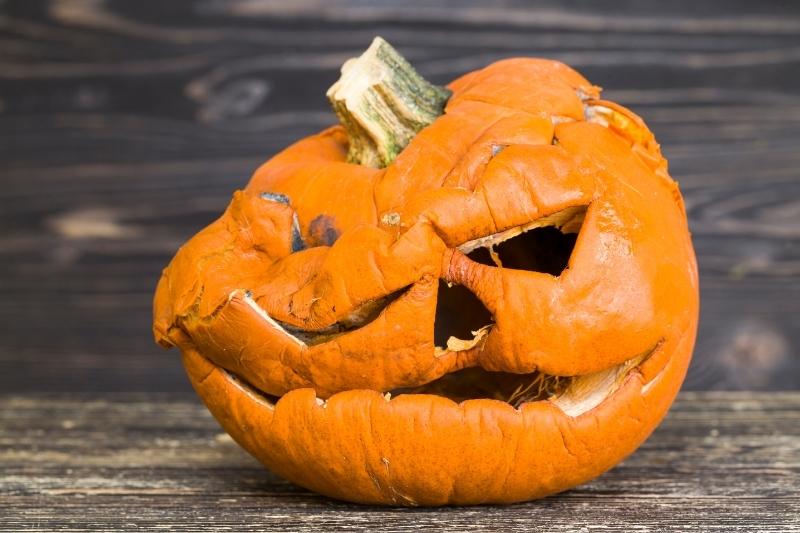 How to Keep Your Halloween Jack-O-Lanterns FreshUnfortunately, jack-o-lanterns don’t last forever. If you plan decorate your front porch with carved gourds this Halloween, then be sure to follow this advice for keeping your pumpkins fresh longer.

If you enjoyed our post on how to carve Halloween pumpkins, then also be sure to check out tutorial on how to make a holiday charcuterie board.
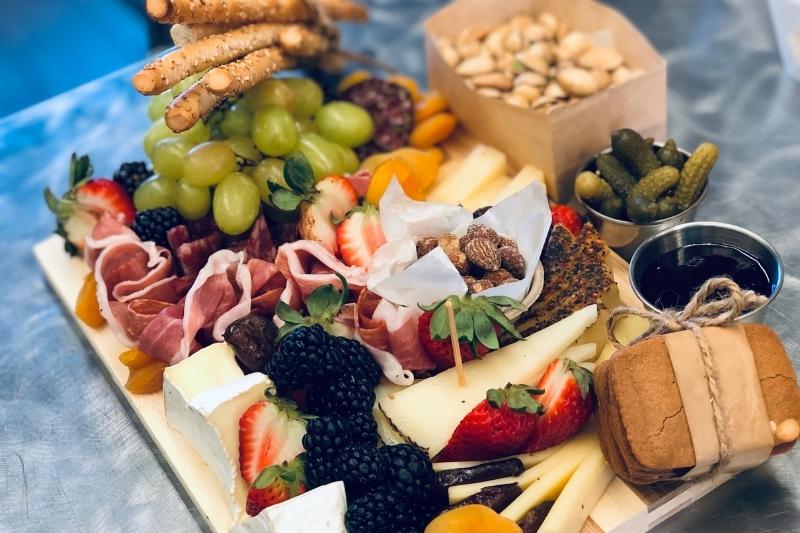
Or, to discover more fun DIY projects, make sure to follow us on your favorite social media platforms. You can find Magnets USA on both Facebook and Instagram. Discover creative ways to transform your cutting and serving boards into unique holiday charcuterie boards! These easy ideas are guaranteed to delight your guests. They also offer a wide range of finger foods for your seasonal parties and events with little effort on your part. 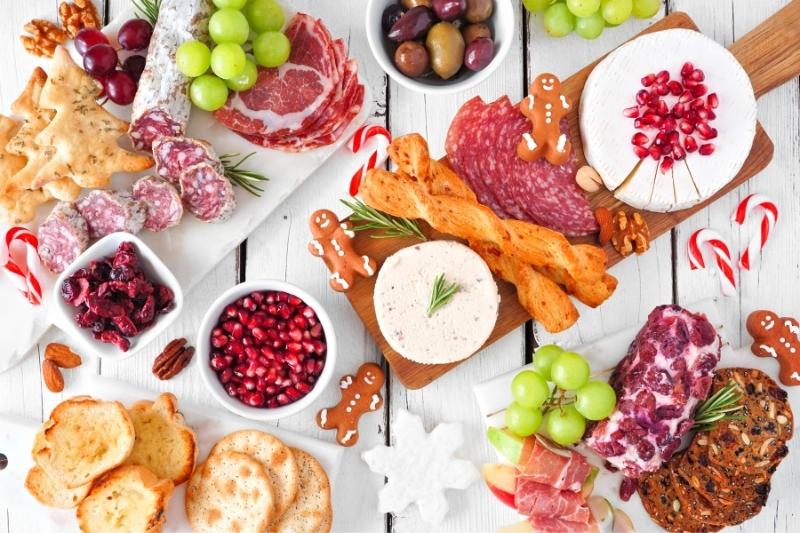 An Easy Solution to Holiday EntertainingIf hours spent baking and cooking isn’t how you envisioned preparing for a holiday gathering, then we recommend a holiday charcuterie board. A quick and easy alternative to traditional appetizers and finger foods, a homemade charcuterie board offers a small sampling of delectable, filling snacks for all your guests. We love this simple entertaining solution! It’s quick and effortless to throw together. So, it works just as easily for planned events as it does for impromptu parties! Keep reading to learn how to build the perfect meat and cheese board or dessert tray for the holidays with our easy ideas! After all, feeding people doesn’t have to be complicated. 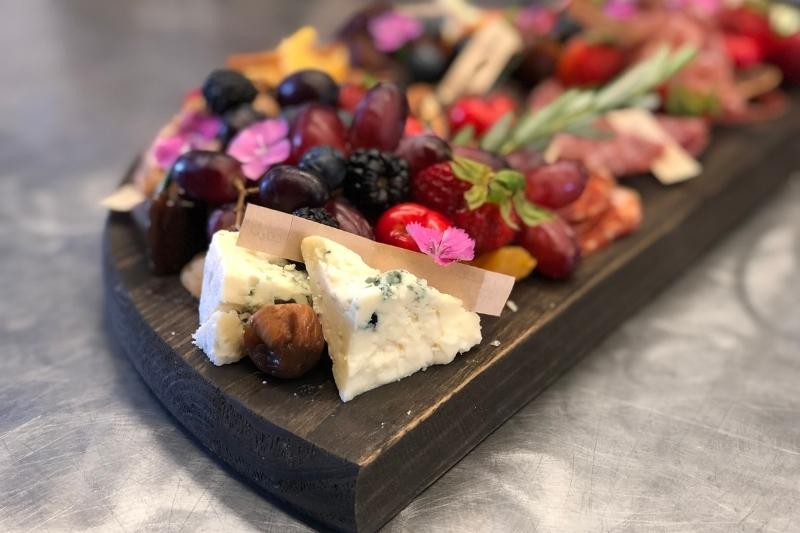 What is a Charcuterie Board?Charcuterie boards are quite simply snack boards that serve as finger foods at parties or appetizers. However, they are typically as nutritious and filling as an actual meal. Meant for grazing, they are designed so you can pull them together quickly as a simple entertaining solution. So, they’re the perfect fit for busy lifestyles. Pronounced shahr-kyu-tuh-ree, the word charcuterie originated in France and refers to a collection of cold cooked meats. In turn, a board by this name refers to an assortment of meats, cheeses, breads, fruits, and nuts that are arranged onto a serving board for consumption. 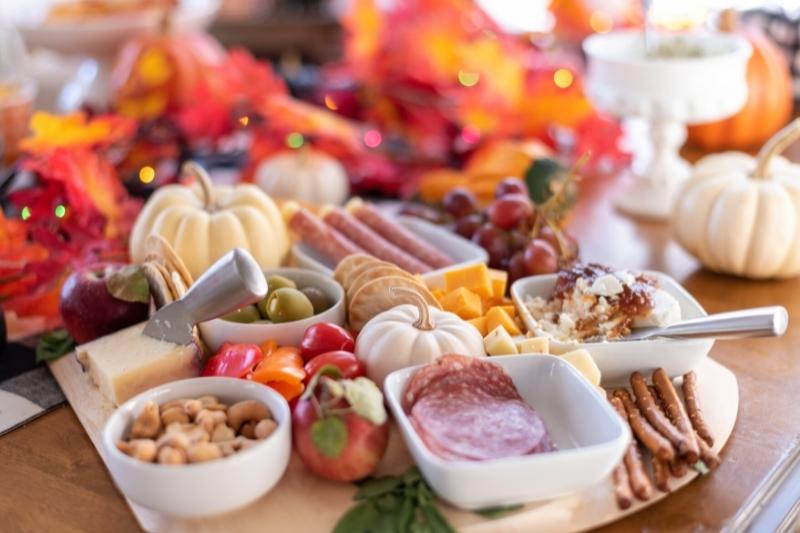 What is a Christmas Charcuterie?A Christmas charcuterie is essentially the same thing as a regular charcuterie board. The difference is that this version may have a holiday design theme or seasonally edible additions. Much like Halloween, food may be placed onto the board in holiday shapes such as a Santa or a candy cane. Or it may contain Christmas treats like Terry’s chocolate oranges or Christmas cookies with peppermint bark dip. 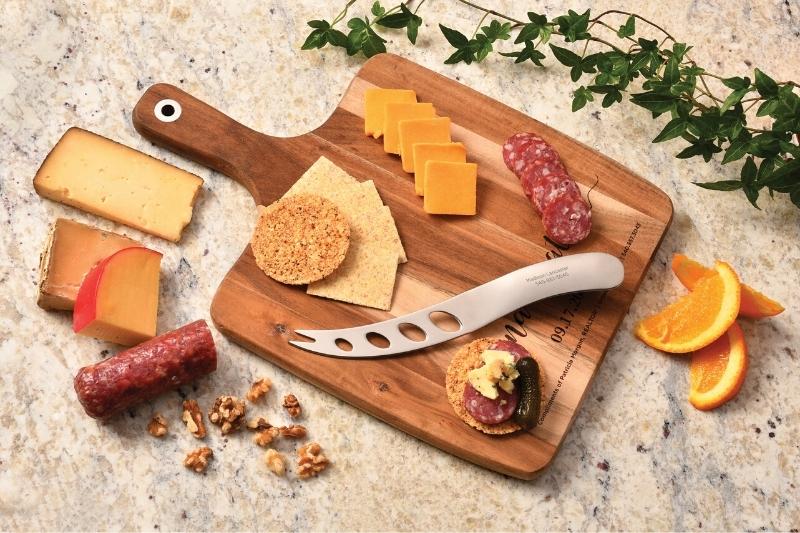 What Should Go on a Charcuterie Board There really is not right or wrong way to create a Christmas charcuterie board. While they typically include a variety of meats and cheeses, you can also create a holiday dessert charcuterie board stacked with foods like cookies, apples, cannoli dip and candies in lieu of savory options. Following are some easy ideas on what should go on your holiday charcuterie. 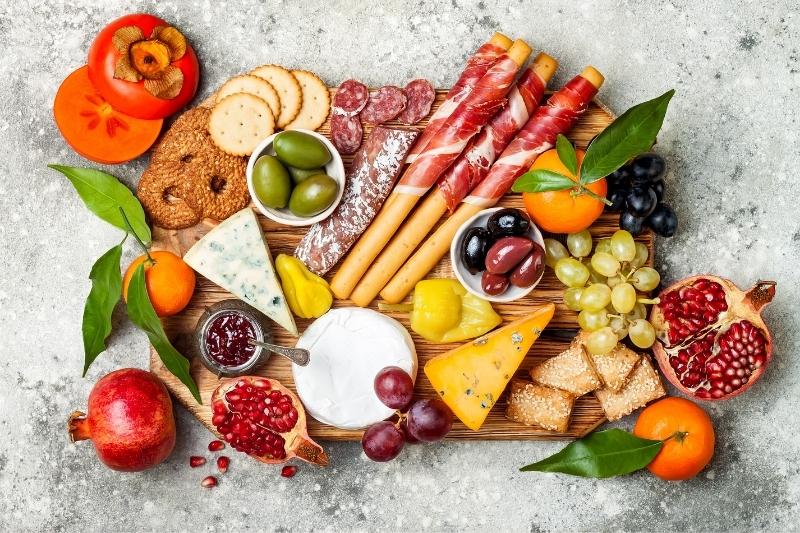 Savory IdeasTo create a savory holiday charcuterie board, we recommend incorporating the following ingredients:
 Dessert IdeasIf you’d like to create a holiday dessert charcuterie board, try adding versions of these fun food elements:
 What is the Best Way to Set up a Charcuterie Board?Here are a few tips to help you create a simple, yet visually appealing charcuterie board for the holidays:
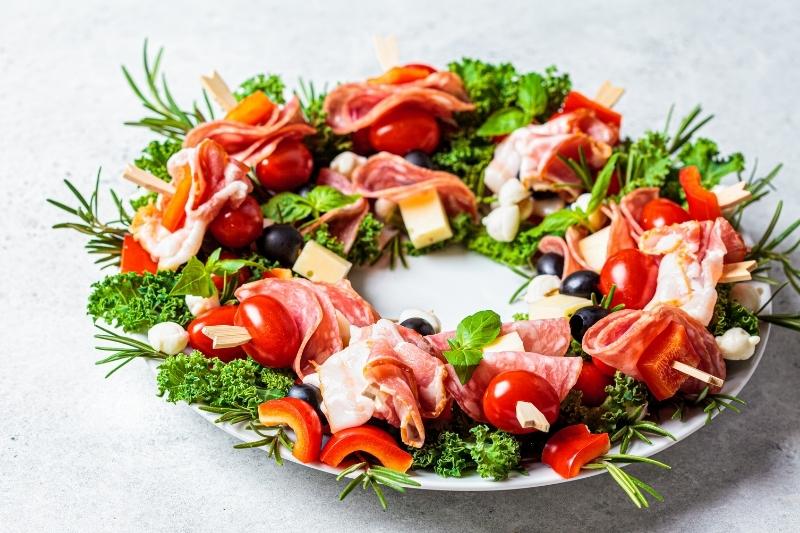
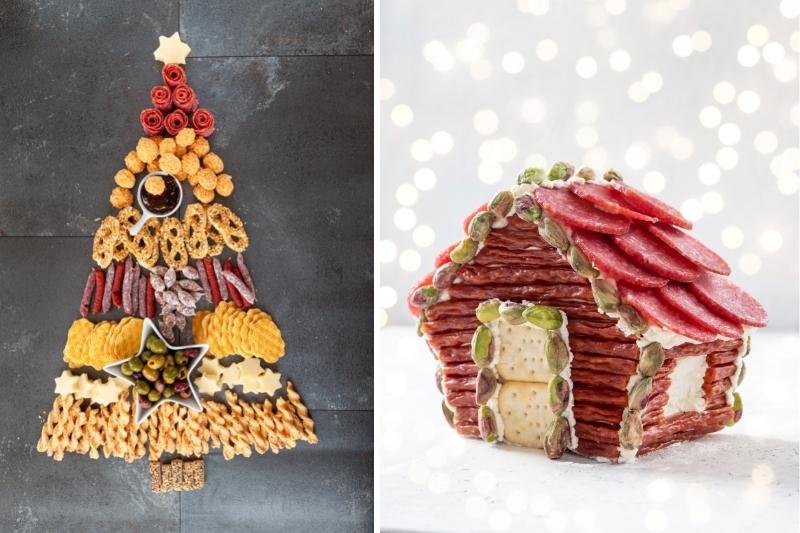 Holiday Charcuterie Board IdeasIf you can’t quite decide how to design your holiday charcuterie board, then try some of these ideas to get you started:
 What to Use as a Charcuterie BoardThe great thing about creating a charcuterie board for entertaining is that you have absolute creative freedom. Not only do you get to choose the foods you serve your guests, but you also can choose any board as well. The shape and size are up to you. You simply need to load it up with a selection of foods that compliment one another. Here are some of the boards you can use for a charcuterie:
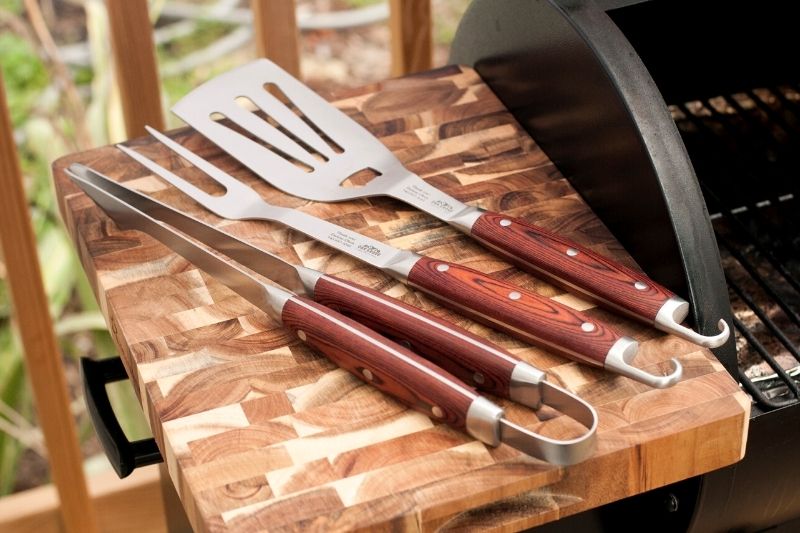
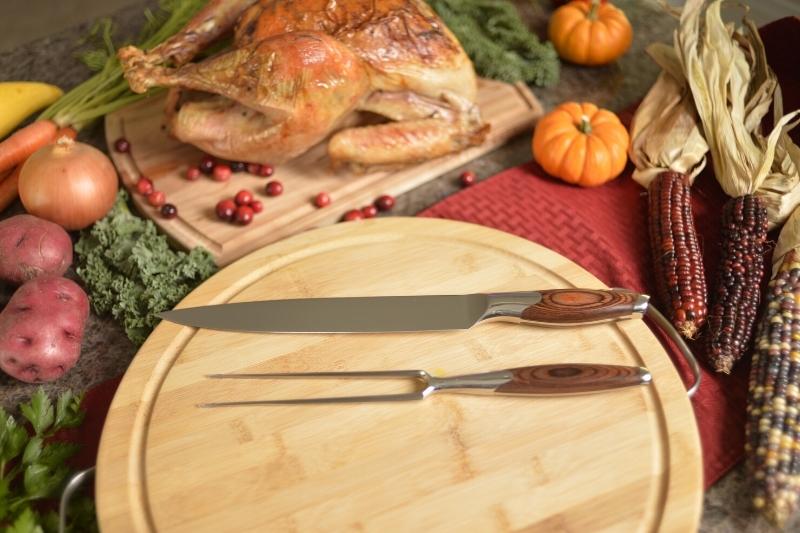
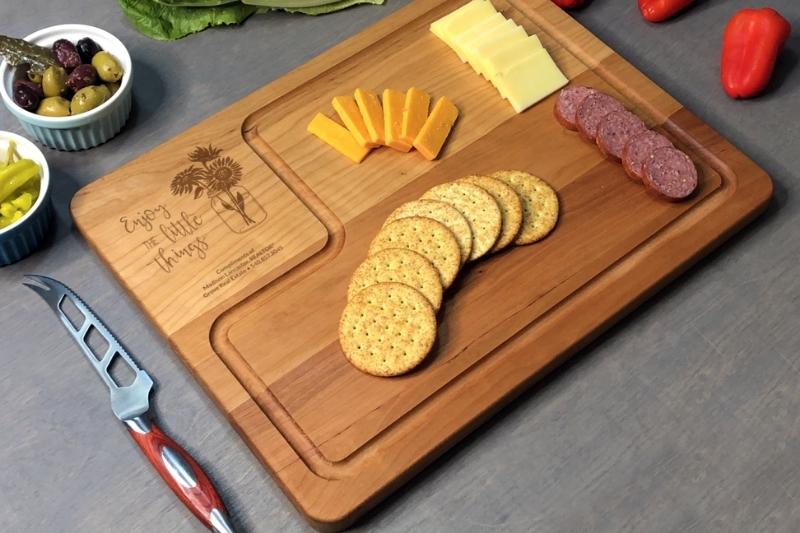 Where to Buy Cutting and Serving Boards for Your Holiday Charcuterie When considering where to buy cutting and serving boards, I always consider quality first and foremost. Not only will a quality charcuterie board last longer, but it will also make your holiday presentation pop! Lifelong Gifts offers a stunning line of serving trays and custom wood cutting boards that are well made, beautiful and designed to last a lifetime. This distinct line of products boasts unique patterns, grains and wood types that are both functional and make a statement as beautiful home decor. In addition, all these products come with free customization. So, they’re perfect not only for personal use, but also to give as holiday gifts. 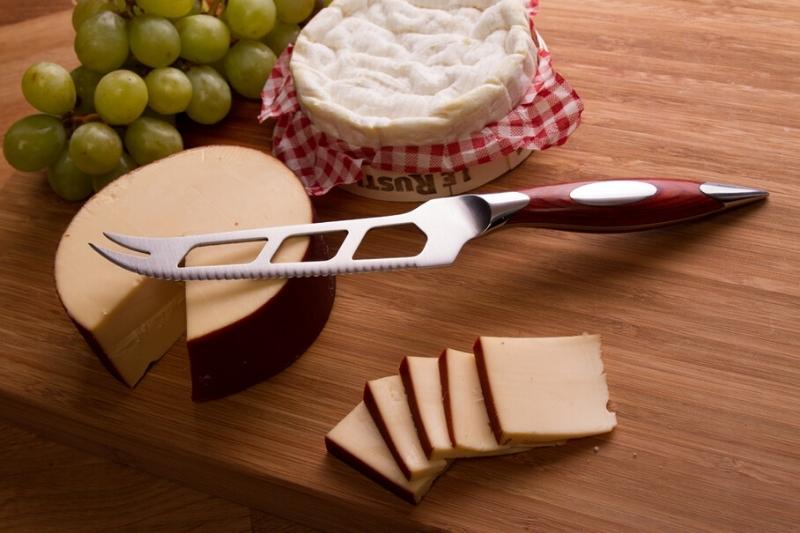 Shop now from the following:
|
 RSS Feed