|
Buying a home is huge milestone. Ensure that your buyers have a smooth closing day on the house of their dreams by taking a few important steps. Explore our top tips for real estate agents on completion date to practically guarantee future referrals. You’ve worked hard to get to the point where you finalize the sale on a home. Unfortunately, any missteps can cost you referrals and repeat business down the road. To make sure closing day is a success for both you and your clients, we’ve round up a list of tasks to practically guarantee a glowing referral. First, however, here's some basic information to help guide your clients through the process, so they know what to expect. What Is Closing Day on a House?The closing day on a house is the day the buyer legally becomes the owner of a new home. This date is mutually agreed upon and set by the buyer and the seller. Although typically, the agent will also work with the lender and title agency on this timeline to ensure that the date also allows them to complete things on their end. This meeting must fall on a regular business day and not on a weekend or holiday. Once decided, the date is then added to the purchase agreement contract. Is Closing Day the Same as Possession Date?The closing date, also known as the completion date, is when all the paperwork is signed and finalized. Funds are released and the title is transferred to the buyer. The possession date, on the other hand, does not always happen at closing. The possession date occurs when the buyer receives the keys to the home they purchased. This usually happens on the following business day to ensure that the transaction closes properly. In some cases, arrangements may be made between the buyer and seller that pushes out the possession date to allow additional time for the seller to move. If the possession date differs from the closing date, it should be laid out in the contract when the buyer can move in. How Long Does Closing Day on a House Take?In general, the entire closing process takes around 41 days, or between four and six weeks. However, this can vary. It’s also not uncommon for there to be closing delays for various reasons. While some delays can be avoided, others may be out of your control entirely. Reasons a Closing May Be DelayedThere are several reasons a closing may be delayed. These include issues with changes in credit or issues with lending, problems with the appraisal, issues with the home inspection, new damage discovered on the final walkthrough, or problems with paperwork. What Happens on Closing Day?On closing day, the transaction for buying a home is closed and the title transfers from the seller to the buyer. All loan documents get signed on closing day. While funds to purchase the home are also transferred on this date. A closing typically takes place at the office of the escrowee. This is generally the title company. The seller, closing agent and/or attorney, title company representative, mortgage lender and real estate agent are usually in attendance. If seller has already signed the deed prior to closing, they do not need to be present. The buyer should bring a photo ID to the closing along with any unsigned paperwork that the title company or mortgage loan officer will need. In addition, a certified or cashier’s check payable to the title or closing company for closing costs not deducted from the sale needs to also be included as all remaining closing cost are due at this time. In addition to paying closing costs listed in the Closing Disclosure provided by the lender, the seller will also sign the paperwork to transfer the ownership of property. While the buyer signs the settlement statement, the mortgage note, and the mortgage or deed of trust. Once these are signed, the title company can register the deed in the homebuyer’s name. What Happens if a Seller Refuses to Close? If the seller backs out of the contract for a reason or contingency not listed in the agreed upon contract, the buyer has several options. The buyer can force the sale by taking the seller to court. Unfortunately, this option can be timely and may present issues if the buyer is in a position where they need to move right away. Alternately, the buyer can sue the seller for breach of contract. In this instance, the seller may have to repay any number of costs including temporary housing and storage expenses as well as fees related to the sale such as surveys and home inspections. In some cases, the seller may also be on the hook for legal fees and court costs amassed by the buyer while seeking a resolution. Other solutions involve the buyer placing a lien on the property, the listing agent suing the seller, or there may be forced mediation. How to Make Closing Day a Success for You and Your ClientsBy preparing for closing day, you can ensure your buyers are able to move into their new home without a hitch. After all, no one wants last minute surprises that drag out the process. The more the client knows and understands the process, the better experience they will have. Tips on How to Prepare for Closing DayHere are our top tips to make sure your seller experiences a smooth transaction on the completion date. Let Buyers Know Not to Take Out Any New LoansTo avoid potential closing delays due to funds, it’s important to instruct buyers not to borrow additional money or open new credit cards once they’ve signed their contract. Doing so can cause changes to the borrower’s credit score which in turn may mean adjustments to the mortgage agreement. You should also check to be sure that buyers disclose all their financial obligations, including child support, as this can also have an impact on debt-to-income ratio. Create a ChecklistCreate and provide a closing checklist for you and your buyer to review. This helps to prepare for any closing contingencies such as a bad home inspection or issues with the appraisal. While surprises sometimes occur, preparing clients up front for all possibilities can help prevent a disappointing experience from turning into a disaster. Look Over All DocumentsYou should also check to ensure all documents are free from errors beforehand and that the title is clear. You should also review the preliminary settlement statement which can be obtained from the lender or the closing attorney. Confirm Repairs Are CompletedIf the seller is obligated to complete repairs to the home, make sure that these have been completed prior to the final walkthrough. You should also get copies of official receipts from the contractor(s.) Make Sure the Transfer of Utilities Is ScheduledCheck with the buyer to make sure they didn’t have any issues scheduling the transfer of utilities into their name for their move in date. We recommend providing the buyer with a list of local utilities for their convenience prior the closing. Our household reference magnets are a great way to provide this information to clients. Not only can they be customized with important phone numbers, but they also include your REALTOR® contact information for any follow-ups for referrals. Schedule a WalkthroughYou should schedule a final walkthrough of the home with your client several days before the closing. This allows you and the client to make sure any repairs needed have been completed, gives the buyer a chance to inspect all repairs that have been made, and ensures that the home is in the same condition as it was when the house went under contract. If repairs were significant, then we suggest asking the home inspector to double check those repairs to ensure they were done correctly and according to the contract. (Generally, there is a small fee for this service between $100-$250.) Send a ReminderTake the time to send out a text or email reminding the buyer of your upcoming closing 1 to 2 days ahead. This reminder should include the time and date of the closing, the address, and parking instructions. We also recommend that you remind clients what they need to bring, such as their driver’s license or photo ID. You can also share this information on your google calendar, so everyone is on the same page. Follow Up After the SaleOnce the sale is complete and you’ve successfully closed on a home, your work isn’t done. There are additional steps you can take to get a positive review as well as new referrals. According to a 2021 NAR report, 68% of sellers used an agent that was referred by a friend or family member. While 53% chose the same agent they worked with prior when buying or selling their home. Give a Closing GiftAs repeat business and referrals are so important to real estate agents, we strongly encourage you to give your clients a closing gift. This not only shows your appreciation, but it also can help you gain those referrals down the road. After all, a great customer experience is an easy way to gain fresh leads from those you’ve worked with in the past. We have lots of REALTOR® closing gift ideas here. Or check out our recommendation for the best closing gift for your clients. Send a Handwritten Card If a real estate closing gift isn’t within your budget, then mail a handwritten card instead. Minute Mail Gifts is an innovative greeting card service for businesses that allows you to send cards and gifts together — all for around $6 each! You can personalize your cards with your message in a handwritten font with a photograph for that special touch. (Don’t forget to take a photo of the new homeowners to use for the card!) Then, your card and gift are mailed for you on the date of your choosing. Minute Mail Gifts offers a full line of happy closing day cards to choose from to make a lasting and meaningful impact. Not sure what to write? Check out tips for writing your message and discover happy closing day quotes here. In addition, you can also use this service to stay in touch after the sale throughout the course of the year. Use it send personalized REALTOR® Christmas cards, real estate pop-bys, home anniversary cards, business birthday cards for clients, REALTOR® thank you cards, and thank you notes for a referral. How to Get More Real Estate Leads We hope that these tips help you provide the best experience possible for your clients. For more ways to generate real estate leads and referrals, be sure to check out these other posts:
Your real estate website isn't complete without a killer bio. Discover our tips for writing a compelling real estate bio that builds trust and converts into leads. Believe it or not, the 3rd most important page on your REALTOR® website is the About Page. If you're struggling to create a great About Page, we can help! Whether you're an experience real estate professional or a new agent, we've compiled the best advice and pointers for getting started. What Should a Real Estate Website Have?A real estate website should put you, as the agent, front and center. After all, you aren’t just selling your services, you’re also selling your experience as an agent. With competition sometimes fierce, it’s important to make sure your real estate bio sells you as a top professional. In addition to crafting a solid About Page on your website, you also want to have strong content that helps both buyers and sellers. Not only do you want them to make the decision to choose you as their agent, but you also want to provide valuable information to help potential clients make the right choices as they navigate the process. By presenting helpful articles and tips to customers in order to guide them through the process of buying or selling a home, your skills and expertise will shine through. This makes it more likely that you’ll gain leads from your real estate website from the readers you engage with your shared knowledge. And finally, your real estate website should also include current listings for houses or properties that you are selling. What is a Real Estate Bio?The purpose of a real estate bio to introduce yourself as a real estate agent and professional in order to generate leads. However, to do this, your bio needs to be engaging. While it seems logical to create a list of your education, accomplishments and experience, a dry About Page filled with nothing but facts won’t motivate potential clients to contact you. Instead, you want to tell a story and get personal. You can then share your professional background in a strategic manner throughout your content to create a killer real estate bio. By sharing your mission and positive highlights about yourself through engaging storytelling, you can connect with new clients in ways you never imagined from something as simple as real estate agent About Page. What Should a REALTOR® Bio Include?A good About Page should tell a story in way that clearly communicates your mission. It should be personal and inspirational. Tell your readers why you love what you do and how your motivation can help them have the best experience when buying or selling a home. Make it PersonalKeep your REALTOR® bio warm and inviting. Share personal details about your life while also letting clients know that can trust you to get the job done in a professional, but friendly way. Do you bake brownies for every open house? Potential customers LOVE to know that you add personal touches to every experience. Share Your Experience Through Story TellingMake sure you include your professional information and experience. However, do so strategically as part of the narrative by inserting tidbits throughout the body of each paragraph. You don’t want your about page to come off like a resume, which can seem cold and impersonal. Include an Introductory VideoIf possible, include a REALTOR® video introducing yourself. This video can also be used on your social media accounts for marketing purposes as well. Not only do videos attract more clients, but they can also help to sell homes faster. (You can learn more about how real estate video marketing can help generate leads here.) Convey Your Connection to the CommunityMany clients also love to hear how you’re connected to the area. So, don’t be shy about sharing why you love where you live and the connection you have with people and other small businesses in the community. Express how the value of your relationships, combined with your expertise, make you the best person for the job. Link Back to Social MediaYou want potential leads to stay in touch. Social media is an easy way to keep connected and remind people of your services. Therefore, be sure to include links back to your ACTIVE professional social media profiles to make it easy to find and follow you online. (Need help with your social media game? Check out these engaging real estate social media post ideas.) Should a Real Estate Bio Be Written in First or Third Person?Most websites will tell you to write your real estate bio in the third person. The idea is that you are providing professional and unbiased details about your experience and services without coming off as self-centered or boastful. Unfortunately, third person bios tend to read more like a business resume than an about page. They can feel cold and impersonal. Because of this, we advise writing your REALTOR® bio in the first person. This helps you establish a personal connection up front, so potential clients feel comfortable reaching out and contacting you. After all, your customers are real people. They aren’t large corporations who are scrutinizing your every detail. People want to know that you can get the job done. But more so, they want to know that working with you will be a friendly and pleasant experience. Presenting your About Page in the first person helps to establish that important first connection. While creative story telling keeps it from sounding like you're bragging. How Do You Write a Killer Real Estate Agent Bio?So, you want to write a killer real estate agent bio? We have several fantastic tips to help you create a compelling About Page for your real estate website. Following is our advice for writing a bio both as an experienced agent as well as a new agent. Top Tips for Formulating a Compelling About PageAs you brainstorm for ideas for your bio, be sure to keep these real estate bio tips in mind. These ideas work well for both new agents as well as experienced industry professionals. Include an Introductory VideoConsider including real estate videos on your About Page. Even a short, 30-second video bio can increase the number of leads you generate. You can also share your real estate video bio on professional sites such as LinkedIn as well as other social media platforms such as Instagram and Twitter. (Find tips for creating real estate videography here.) Relay to Potential Clients You Care About ThemA good REALTOR® will ask about a client’s goals and cares about building relationships. Therefore, keep these things in mind when constructing your bio page. Break Up Your ParagraphsKeep your paragraphs short. Websites and blogs aren’t like books. Short paragraphs, no more than four sentences long, make it easier to read online content. It also helps prevent your readers from becoming overwhelmed. In addition, you’ll also want to be as concise as possible, so that every word counts. Draw the reader through your bio with interesting tidbits and storytelling. Write for Search EnginesWhile many sites will tell you keep your agent bio between 250-400 words, we strongly advise against this. If you want your about page to help your real estate website rank in search engines, the final length of your page should be at least 600 words to boost the overall SEO (search engine optimization) of your entire real estate website. You should also use targeted keyword headings to break up content at least every 300 words. This will also keep your page from feeling like it’s too long and help it flow more easily. While bullet points are another great way to present information that’s easy to read. Use PhotographsIn addition to using short paragraphs and headings, break up your written content with photographs. By including photographs on your about page, you not only encourage readers to read all the way through, but it will also make your page easier to read. Be sure to include personal photographs, or those of you in action, and not just a styled headshot. Readers love seeing photos of pets, friends and family members. Do you love to cook? Share a picture of yourself cooking your favorite dish! Let Potential Real Estate Clients Know Why You Love What You DoShare your origin story. What inspired you to get into real estate? How did you become successful? What do you love most about being a real estate agent? All of these are great questions to answer in a real estate agent bio. Know Your AudienceSelling homes versus selling luxury or commercial real estate means different clientele. Therefore, you want to write your real estate bio so that it speaks to your target audience. For higher end or commercial properties, lean more towards professionalism than you would if you were speaking to a traditional homeowner or buyer. Avoid industry jargon if your client base is an average Joe. Set Yourself Apart from the Competition Your About Page is a great place to include several key testimonials from happy customers. You can also include awards or honors you’ve received as well as statistics indicating the number of homes you’ve helped buy or sell or the average percentage of sales you’ve sold for over market value. Then relay how this criteria works to your clients’ advantage. Additionally, you can also provide links back any positive media coverage you’re received. Include a Call to ActionYour real estate about page not only gives potential clients a peak into your life and experience, but it also serves as a way to generate new leads. Therefore, in addition to including links to your social networks, you should also conclude your bio with a strong call-to-action. A call-to-action can be any number of things based on what you have in place. Here are some examples of calls-to-action you can use to increase engagement and find new clients:
Keep It AccurateFinally, you want to update your page as needed. As information about you or your experience changes, be sure to make additions to your bio or correct outdated information. You also want to make sure that you proofread your About Page, or have someone else do it for you, to check for accuracy and typos. How to Write a Real Estate Bio for a New AgentIf you are a new agent writing a real estate bio, there are still great ways to convince consumers that you’re the right pick for the job! Here are some tips on how to write a killer real estate bio even if you are a new agent. Lean on the Expertise of OthersIn addition to the real estate bio tips we mentioned previously, you can also lean on your brokerage to help build up your own professional reputation. Share Your PassionShare your passion for what you do. While you may not have much experience yet, illustrating how passionate you are to help others can go a long way toward enticing new clients. In some cases, your drive is what will set you apart from more experienced REALTORS®. Use Community Knowledge to Your AdvantageUse your local expertise to win over new leads. If you were born and raised in the area you’re selling, then you know the area better than anyone! Use this to your advantage by indicating to clients that you know where to look to find their perfect dream home in a location they’ll want based on the criteria they provide. Utilize VideoWhile video is a proven way to generate more leads, it becomes an even more valuable as a tool for new real estate agents. A video can help you craft a strong About Page with a personal touch that helps connect you to more clients. Not only do real estate marketing videos allow your personality and enthusiasm to shine through, but it’s also been shown that 73% of homeowners are more likely to list with an agent who use video to sell properties. Therefore, a video introduction neatly ties in with this real estate marketing strategy. More Ways to Market Yourself as a Real Estate ProfessionalNow that you know how to write a killer real estate bio for your website, be sure to explore these other marketing ideas:
Video marketing is a great resource for REALTORS® and agents. Discover how video gives you an advantage over static listings. Plus explore ideas for creating captivating real estate videos that bring in more leads than ever while also increasing interest in the homes you sell! Video Marketing for Real Estate AgentsUtilizing real estate video marketing is a great way to gain new clients – and put yourself ahead of the competition. Recent data indicates that 73% of homeowners are more likely to list with an agent who uses video to sell their properties. Therefore, you can increase your client base by making video part of your game plan when selling homes. In addition to making your services more attractive to sellers, video also helps to sell homes more easily and for a higher price. Keep reading to learn why real estate video marketing is so effective. Plus discover tips and ideas for creating your own successful marketing videos for your real estate business. What Percentage of REALTORS® Use Video?NAR (National Association of REALTORS® Research Group) reports that approximately 37% of agents use video to market the homes they sell. Considering 70% of buyers watch video tours prior to choosing an agent, it’s a no-brainer that video is a valuable tool to reach new buyers. Additionally, as not all agents harness the power of video, it’s an easy way to stay ahead of the competition. Does Video Help Sell Real Estate?Videos are important in real estate for many reasons. Number one being that they help to sell real estate by bringing in more leads. With more eyes on the property you are trying to sell, the better the outcome for you as the agent as well as for the seller who can often get a higher price for their home. Real Estate Video Marketing StatisticsHere are some marketing statistics that illustrate how video helps to sell real estate.
How Do Real Estate Videos Get Clients?More buyers are turning to videos to make a decision both on where to live as well as who to hire. As a result, video actually helps to sell more real estate than the static images and listings you may be accustomed to. Not only does real estate videography give potential buyers a better sense of the property being offered, but it also helps clients put a face to your brand as an agent. When this happens, you become more relatable to potential buyers. Putting a face to a name not only builds trust, but it also makes you seem more friendly and approachable. Additionally, real estate video marketing has proven ROI (return on investment.) Video is used by all types of marketing professionals because it works! And real estate is no exception. When you incorporate video into your marketing strategy you’ll increase your followers, boost awareness of your brand, and gain more leads than ever before. It’s been shown that video is effective at growing revenue an average of 49% faster than without. In addition, videos also get shared more often on social media giving your video listing a chance for a greater volume of organic traffic. With videos being shared 1200% more than static images and text, information about your services and listing will spread much more quickly. Including real estate video marketing on your website can also help to boost your ranking in search engines. While including a landing page video is shown to increase your leads by 80%. While not everyone remembers a static webpage, clients who watch videos are 95% more likely to retain the information you provide within your real estate videography. Finally, employing video marketing as a real estate agent means consumers spend more time on your website. 88% of people will spend additional time on a site with video. This in turn means more eyes on your listings and a higher chance of scoring new leads. How Do I Make a Real Estate Marketing Video?You don’t need to hire a real estate videographer to make your videos. Instead, you can learn how to make your own real estate marketing videos. Not only will this save money, but it will also give you complete control over the look and feel of your videos. Following are some great tips on how to create your own real estate videography. Plus, we share some video ideas for REALTORS® to keep potential clients interested and engaged. You'll also learn where to host and share your real estate videos once they’ve been created. Tips for Making VideosHere are our top real estate marketing video tips for creating engaging and effective videography:
REALTOR® Video IdeasOnce you’ve committed to creating videos for your business, it’s time to put that plan into action! Following are multiple real estate agent video ideas that you can employ when filming. These suggestions will help keep your videos interesting by allowing you to employ various forms of content that have appeal to different viewers.
Where to Host VideosNow that you’ve created your real estate videos, you need a place to host them so that they can be shared with the populace. You have several options here, which include both free and paid choices. Here are the top options for hosting:
Where to Share Marketing VideosThere are numerous places to share REALTOR® marketing videos online. Here are our top choices to put your videography to work for you!
More Real Estate Marketing TipsWe hope these tips help you move forward using video marketing for your real estate business. In addition to this information on real estate video marketing, we’ve also created other real estate marketing tips to help you succeed.
We can’t wait to see the real estate videos you come up with to promote your services as an agent. In the meantime, also be sure to explore the magnetic products and marketing services we offer.
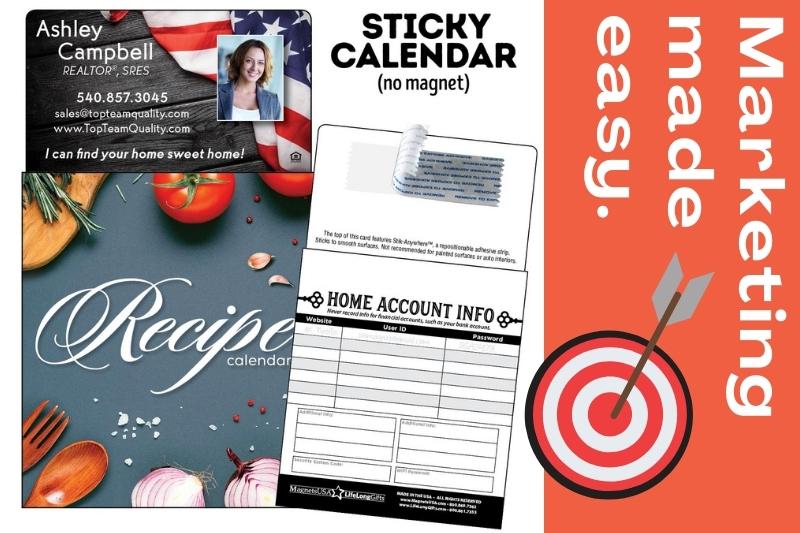
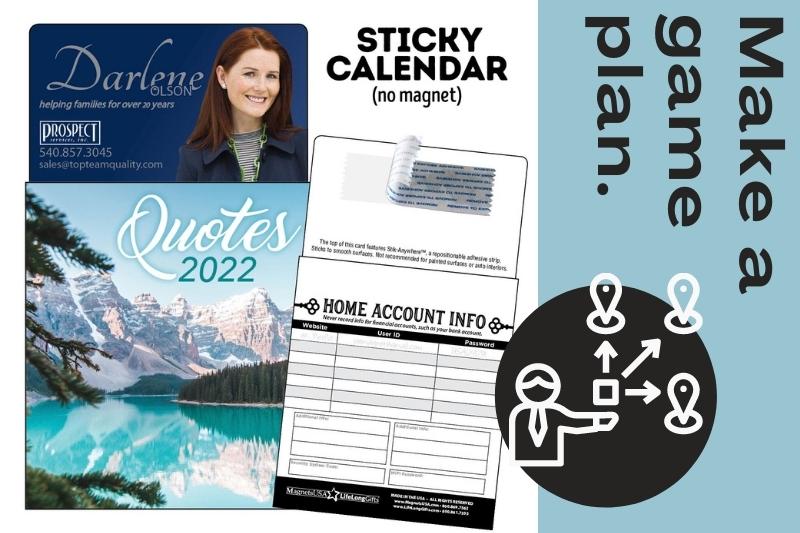
In the meantime, make sure your subscribe to our newsletter for updates on sales and new promotional products. You can also follow us on Facebook or Instagram for more ideas to help you get more leads. Introducing our new stick-on calendars! While they may not be quite as fun a Christmas advent calendar, this fresh product line is still an exciting way to market to your customer base. Not only will these promotional products last well beyond the holiday season, but you’ll also receive year-round advertising from a small, one-time investment. Learn about this wonderful line of pad calendars and how they can help give your marketing a boost. Plus discover great tips for distributing promotional calendars to prospective clients and customers. What Are Stick-On Calendars?Stick-on calendars are promotional calendars that display your business information on a useful product that consumers love. Our personalized sticky calendars are a budget-friendly solution to your marketing needs. Unlike our tear-off calendar magnets, this stick-on version adheres to any smooth surface – even if it’s not magnetic! Featuring our Stik-Anywhere™ adhesive backing, these pad calendars are repositionable and can be reused multiple times. Choose from our most popular themes including quotes and recipes as well as our New Year and welcome home designs. What Are Promotional Calendars?Promotional calendars are used to advertise a business year-round. As they are often printed with a business logo and contact information, they help to increase brand awareness and keep your contact details within easy reach. Overall, the biggest advantages of using promotional calendars are their cost effectiveness and constant reinforcement of your company over a 12-month period. Stick up calendars are an easy way to ensure your calendar is displayed and used on a regular basis. What Are the Uses of Calendars?People love calendars for their many uses. It’s part of what makes getting them into the hands of clients so easy as a viable way to generate new leads and drum up business. They are used for a number of reasons, but most importantly, they provide an easy reminder of important events. They can also help users visualize their schedule at a glance. Calendars are a tool often used for:
Why Choose Sticky Calendars?Here are the benefits you get from our small sticky calendars:
Why Are Sticky Calendars Great for Marketing?In addition to all the great features our promotional pad calendars provide, they also provide some amazing marketing benefits. Here are some of the ways that press and stick calendars can help your business grow:
Where to Distribute Stick-On CalendarsSticky up calendars are really easy to distribute. Here are some of the ways you can get this promotional product into the hands of your customers:
Now that you know about our great new product line, be sure to explore our other quality promotional products. Plus, discover more helpful marketing ideas to help you create successful advertising campaigns for your business.
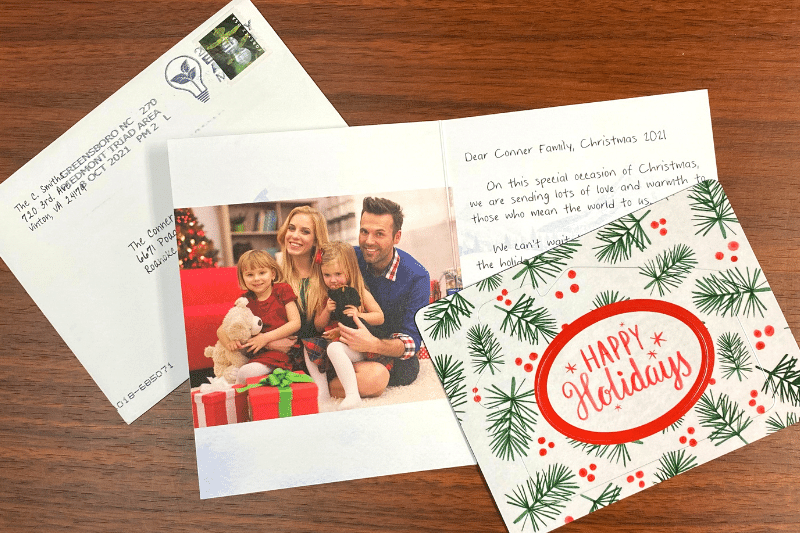
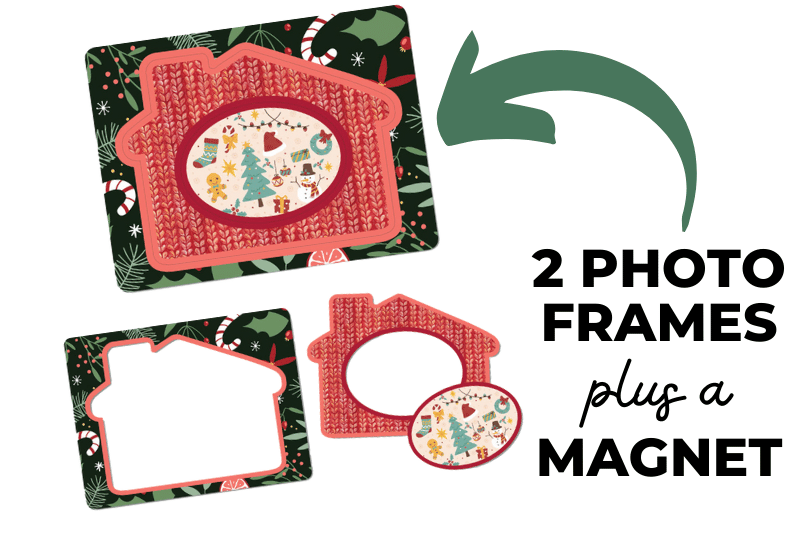
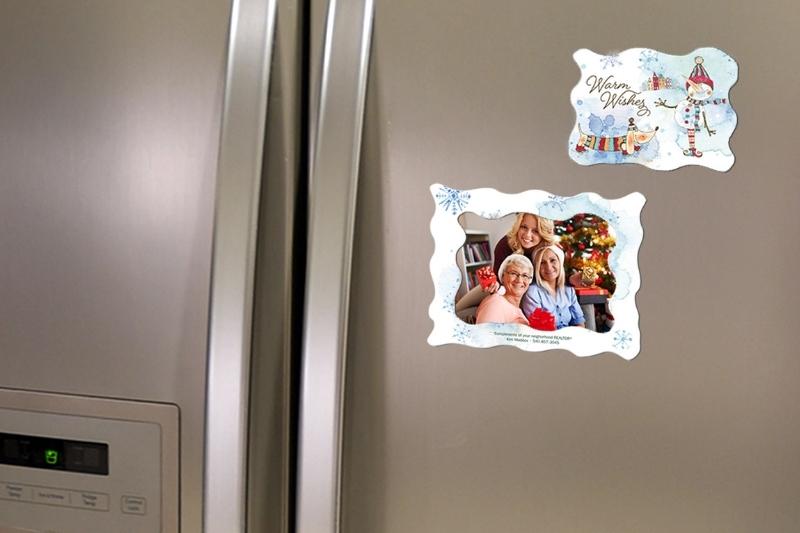
You can also subscribe to our newsletter for updates on sales and new promotional products. Or follow us on Facebook or Instagram for more engaging solutions. Learn how to create and send personalized Christmas photo cards to friends, family, and clients for the holidays. Include a small gift with every card you send in addition to handwritten fonts and up to two printed photos inside! Christmas is generally considered one of the biggest holidays of the year. In the United States, around 1.3 billion Christmas cards are mailed out to mark the occasion and send well wishes each year. As many of us don’t send out greeting cards regularly, Christmas cards are a great way to touch base with friends and family. It’s also the perfect opportunity to share a photo and memorialize the year! Whether you’re an individual, business or organization, we provide the best way to create and send personalized greeting cards and gifts with your photos. Keep reading to learn about the unique products offered by Minute Mail Gifts. Plus explore creative ideas for your Christmas photo cards. Personalized Christmas Photo CardsYou can make the holiday even more memorable when you send Christmas photo cards with a magnetic photo frame. Our handwritten cards can be personalized not just with your message, but your favorite photographs as well. By sending personalized Christmas cards and a photo frame gift together, you can make a huge impact. Our decorative magnetic frames are an easy way to display the photos printed inside the card. Or they can also be used to exhibit other holiday or family portraits on the refrigerator throughout the season. We offer several options for matching holiday greeting cards and photo frame magnets. So, you send a sentimental and thoughtful gift with every Christmas card you send. You’ll save both time and money when using our greeting card service to mail out your custom holiday cards. Plus, it’s so easy to use, you can even create cards on your mobile device! Ideas for Christmas Photo Cards Taking and choosing the right photo to include inside your holiday greeting cards doesn’t have to be hard. If you need help deciding on the right picture to include inside your cards, here are some ideas for Christmas photo cards:
How to Send Personalized Holiday Cards with a PhotoOur Christmas photo cards are an inexpensive way to send a card and a holiday gift together. You can easily send personalized Christmas cards with up to two photos printed inside using Minute Mail Gifts. In addition, you can include a simple gift inside. Whether you choose a Christmas tree ornament or magnetic photo frame, our affordable gift options make your Christmas cards even more unique and special. To create a personalized photo card for the holidays, follow these steps: 1. Pick one or two photos to include inside your Christmas card. 2. Once you’ve decided on the picture(s) you’ll use to customize your holiday greeting cards, select the greeting card design you’d like to send. 3. Choose a gift to send with your custom Christmas photo card. You can choose from magnetic photo frames, Christmas ornaments, magnets, magnetic bookmarks, stickers and more! 4. Select a card layout for both the left and right writing panels inside the card. Both sides of the card offer options for a message, photograph, or both. Therefore, you can include two photos inside each card if you like. 5. Customize your Christmas card with the photo or photos you’ve chosen. Then type in the message you’d like to appear. You can choose from a variety of handwritten fonts for that extra personal touch, as well as choose the font size and alignment. 6. Address the envelope. Fill out the return address with your information along with the address of the recipient. If sending a card out the entire family of the same last name, be sure you don’t commit a grammar faux pas. (Read more on that below.) 7. Have us mail your card out right away. Or schedule your card to mail on the date you indicate. Of course, you can also send personalized Christmas cards with no photo if you don’t have one that you’d like to include. Simply choose a card layout that indicates text only, then proceed with creating your custom holiday greeting. How to Address Your Personalized Photo Christmas CardsAvoid the apostrophe faux pas when addressing holiday cards or creating personalized gifts! Apostrophes are used to show possession, show omission of letters (such as when writing contractions) and to form plurals of single letters, numbers, and symbols. When making the plural of a last name, an apostrophe is NOT used. For example, if you are addressing multiple members of the Jones family, you would spell the plural of their last name as the Joneses. You would not use Jones’ as you are not showing possession. The correct way to spell the plural of a last name depends on the last name. For last names that end in S, X, Z, CH, or SH, you would add -ES to the end of their name. If the last name ends in any other letter, simply add -S to the end. When to Order Custom Photo Holiday CardsYou can order your Christmas photo cards from Minute Mail Gifts whenever you like as we offer quick turnaround times on every purchase. Cards are shipped either the same business day or within one business day after they are printed. We send all personalized greeting cards via USPS First Class Mail. Therefore, the anticipated delivery date is 4-7 days after shipment within the continental United States. When Should I Mail My Holiday Cards?We recommend that you mail your Christmas photo cards and gifts around Thanksgiving for timely arrival. You can either send them out a few days prior to or several days after the holiday. The goal is to make sure they arrive before Christmas. However, you also want time for friends, family, and clients to be able to create a Christmas card display. If you aren’t able to send your cards at Thanksgiving, we recommend allowing for 4-7 days for arrival under normal circumstances. However, during seasonal and holiday peaks, it is important to keep in mind that USPS often experiences longer delivery times. Therefore, it’s important to factor this into account when scheduling or mailing cards that need to arrive by a certain date. If you aren’t sure if your cards will be received by Christmas, then consider mailing a New Year’s card instead. If you’re interested in creating bulk Christmas photo frame magnets to send as client gifts or promotional marketing products, then be sure to check out our line of personalized magnetic photo frames at Magnets USA®. More Holiday IdeasFor more great ideas for the holiday season, check out these other informative posts:
|
Stay Connected© 2023 Stickers Plus, LTD | Privacy Policy
|
Contact |






 RSS Feed